 “HOME IS WHERE THE ART IS.”
Next month already marks my one year anniversary of moving to NYC and I also just resigned my lease for another year! More on that later, but seriously though – where has the time gone?
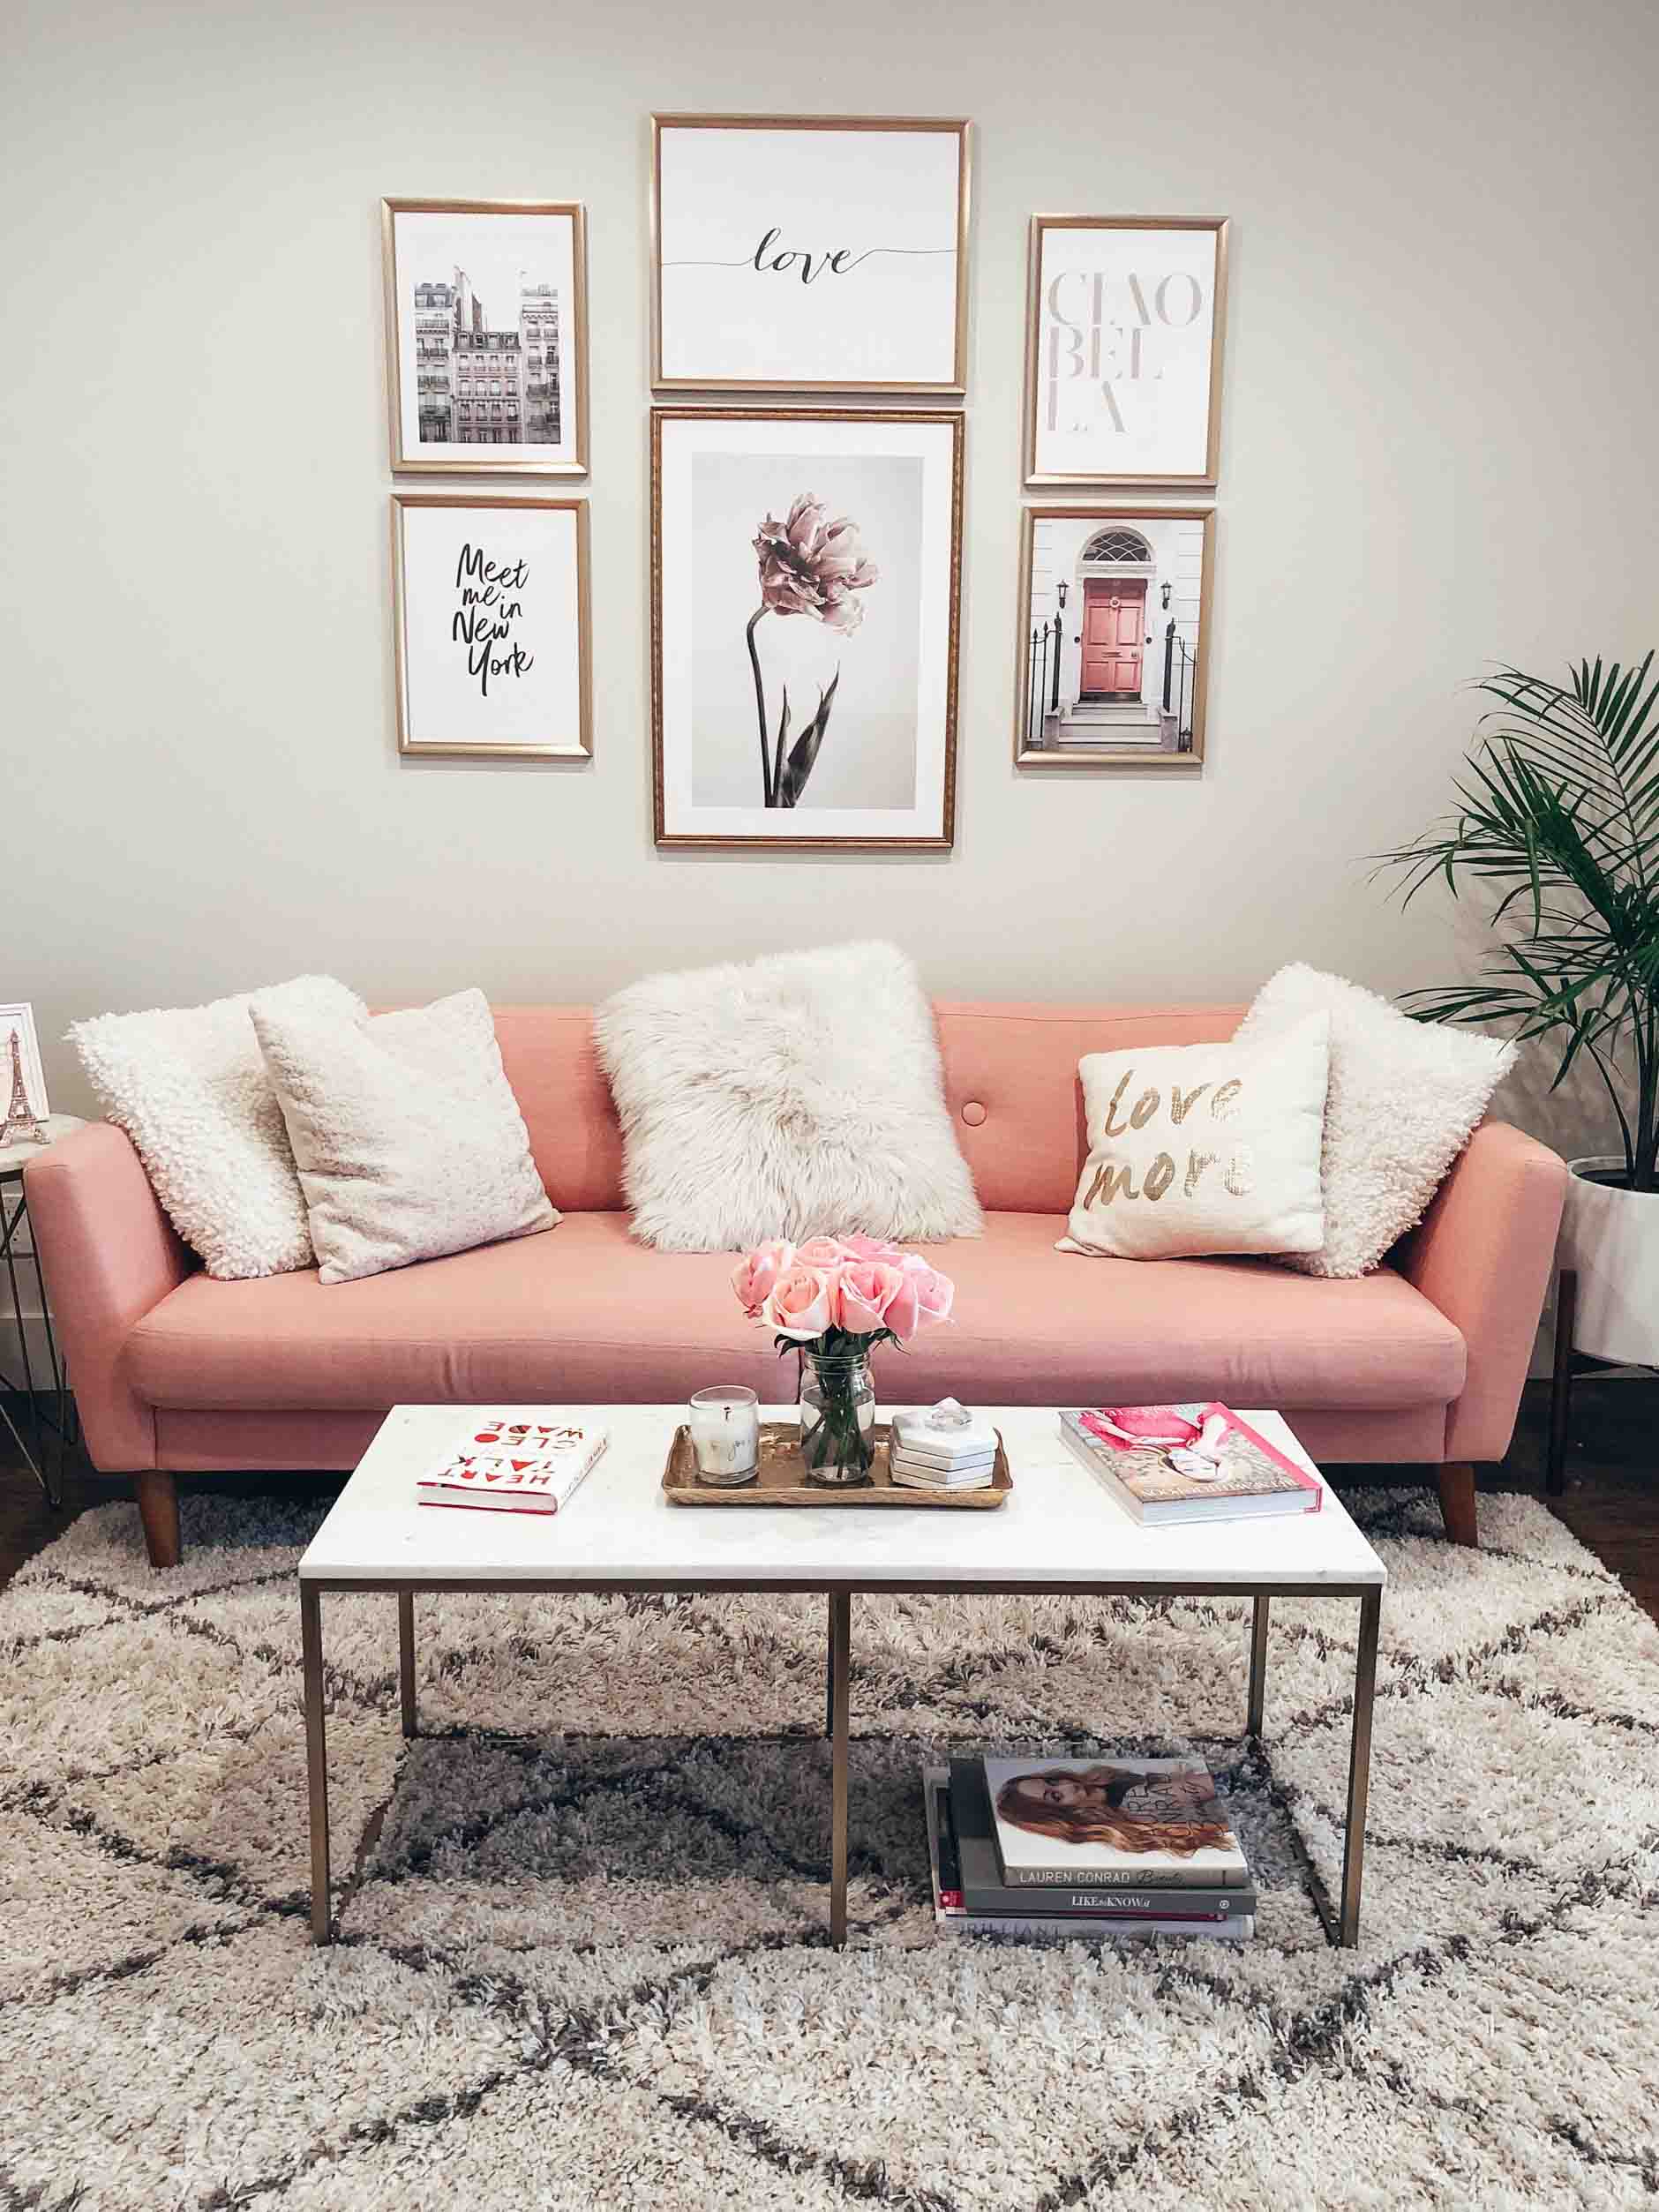
After almost 12 months, I have finally come up with the perfect mix of prints for my living room. It’s amazing what a gallery wall can do for your space! This entire decorating and moving process has literally been a journey all within itself. I give major props to those who can move in and decorate their new home all within a month’s time. That was definitely not the case for me and my indecisiveness, but I’m so happy that I took my time and didn’t rush my decisions. It was extremely important for me to be 100% happy with all of the pieces in my apartment.
I’ve quickly learned that the decorating process is never really over though. I find myself constantly incorporating new pieces and switching up my decor items. There are a few little things that I want to change in my living room – like my throw pillows and adding in a floor lamp behind my accent table- but this gallery wall truly brought the space to life in a whole new way.
I definitely still plan on doing a full apartment tour here on the blog, but for now I hope that you enjoy this little piece of my home!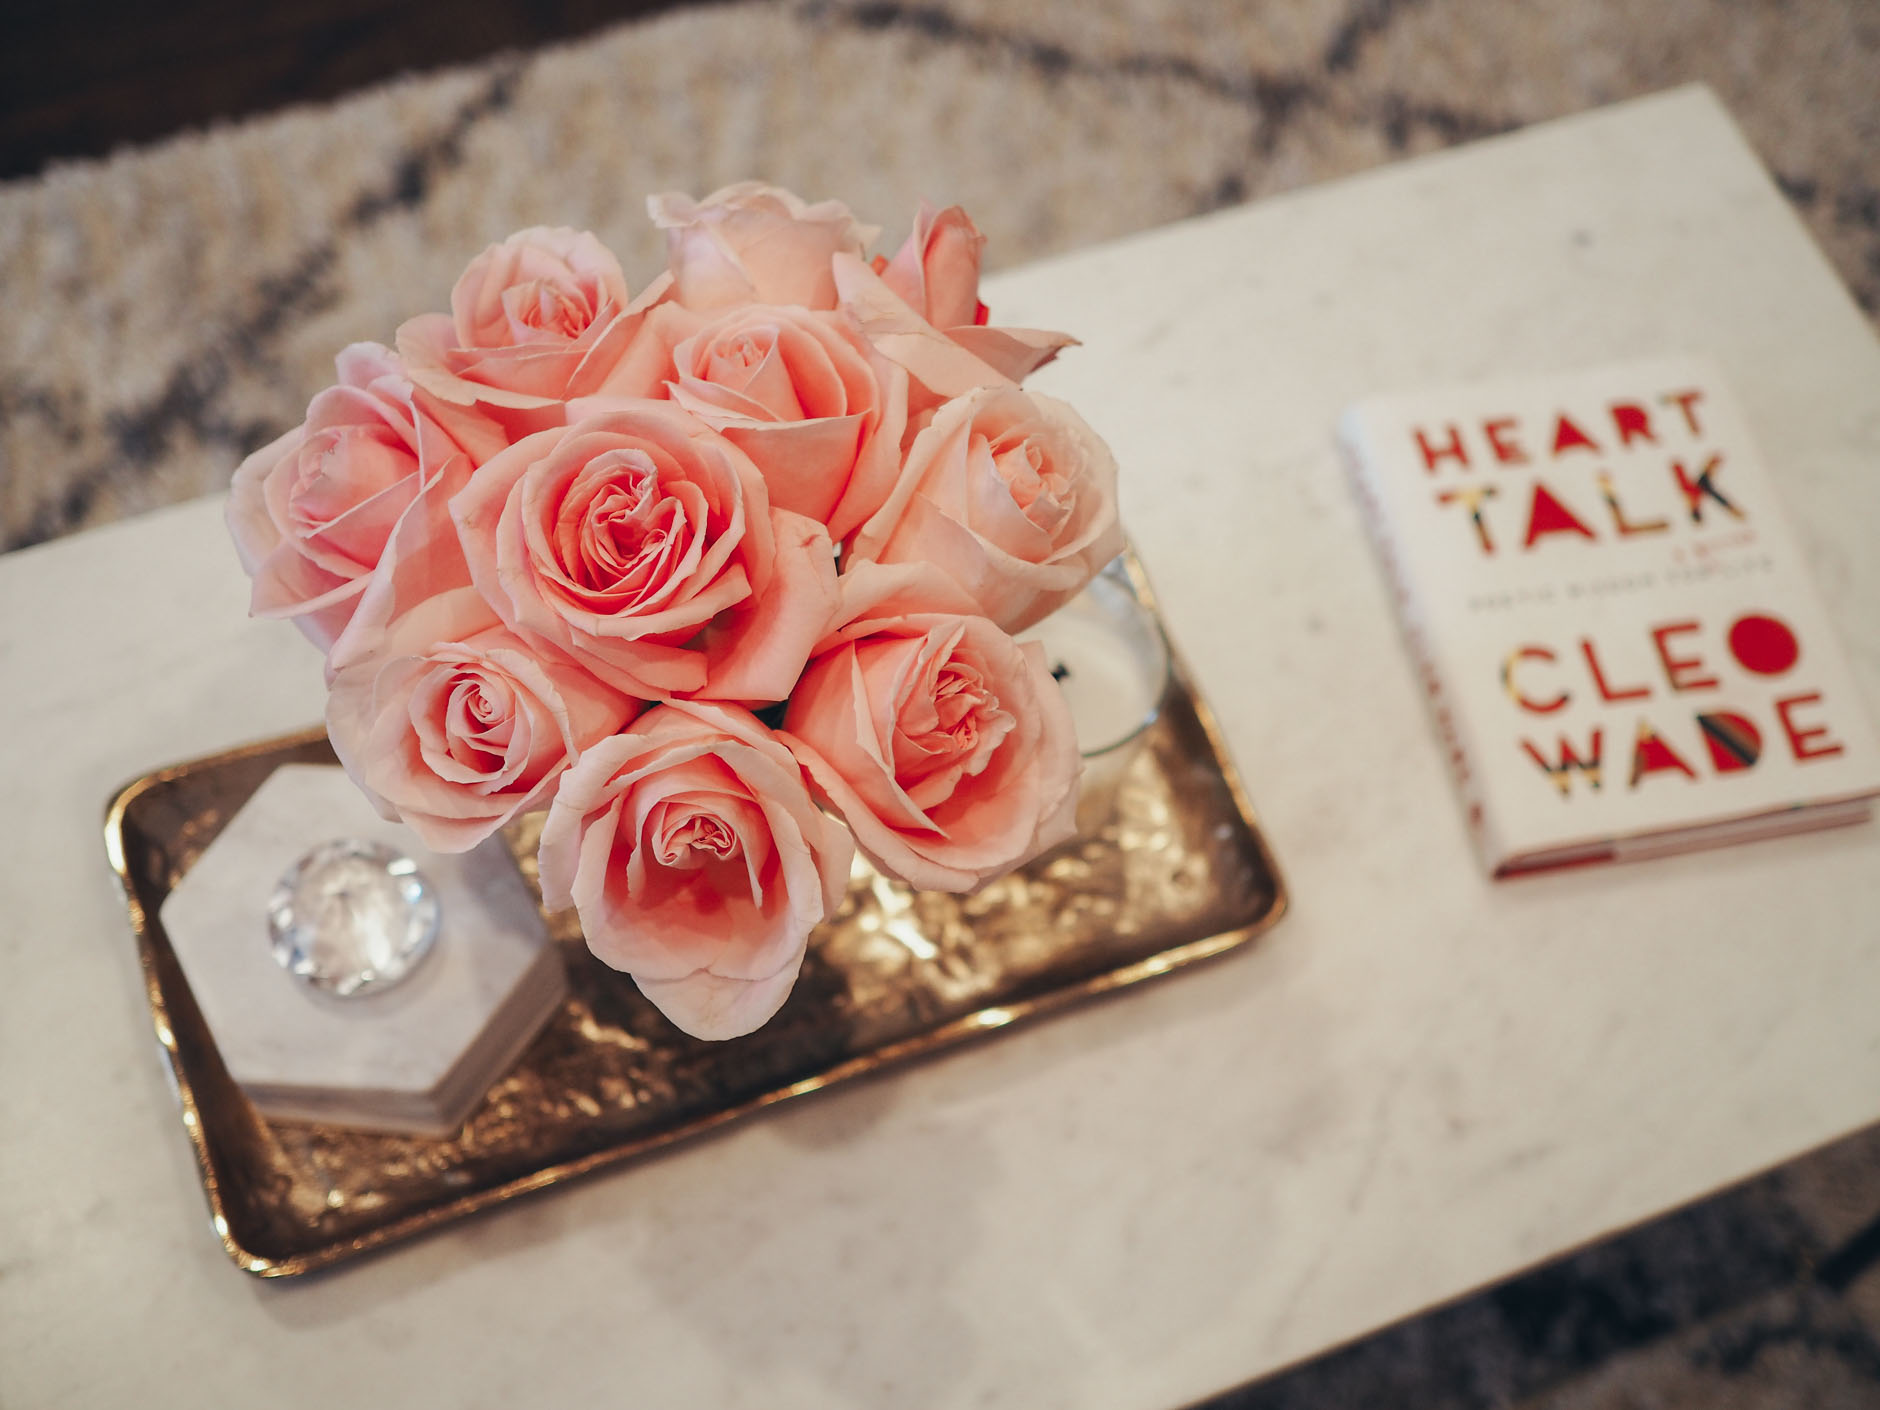
 CHOOSING PRINTS & TELLING A STORY
This was such a long process for me, mostly because I didn’t make it a decor priority when I first moved. Over the months, I really took my time to choose the prints that I wanted. I was looking for ones that matched my living room color scheme, but I also wanted to tell a story with each photo. I think that’s what makes gallery walls so special. It becomes such a representation of who you are.
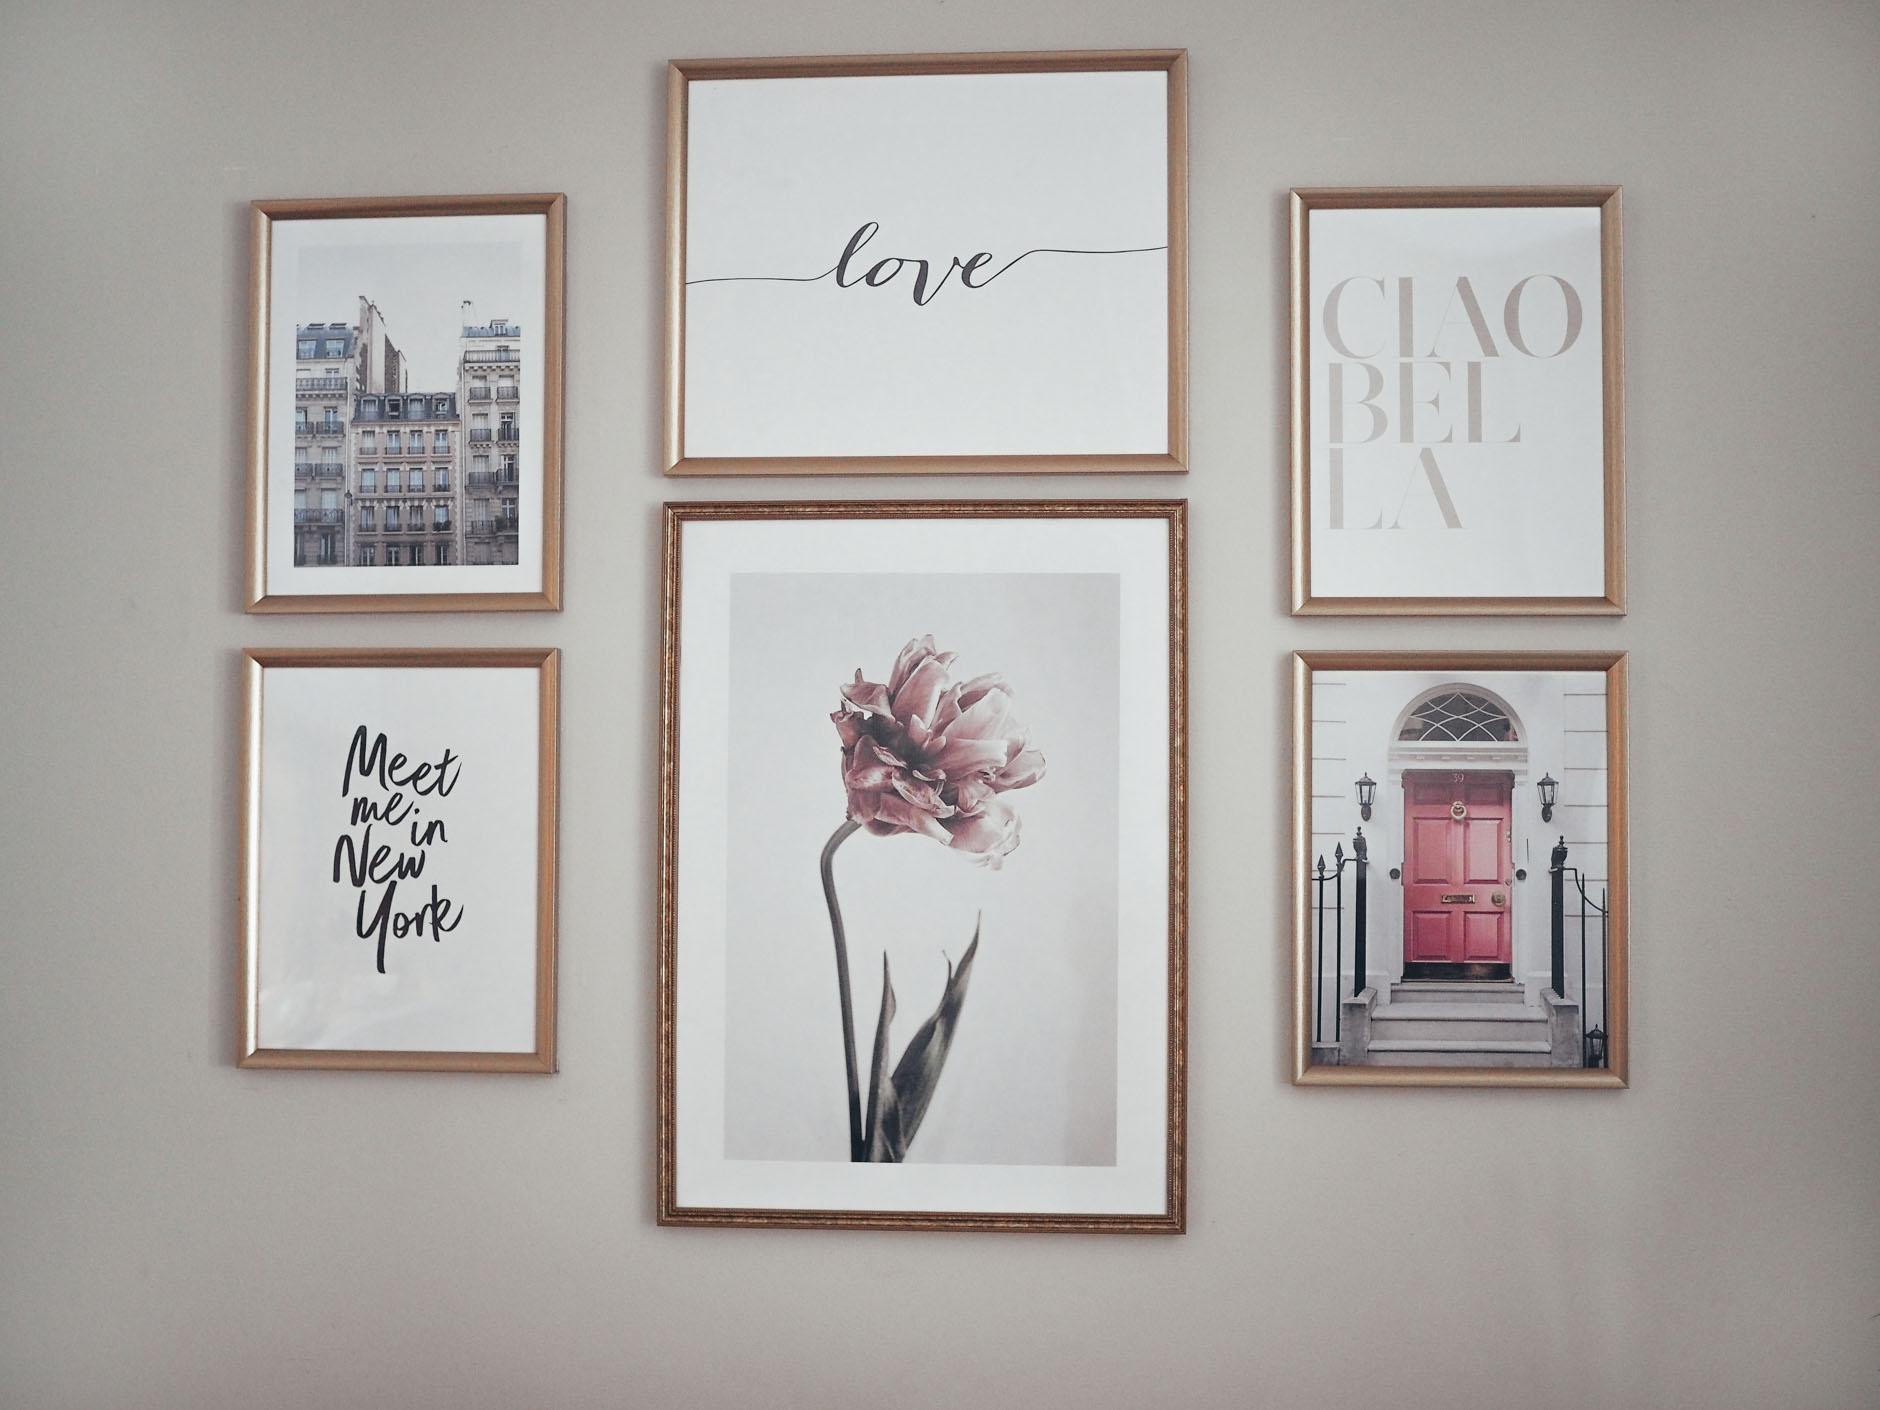
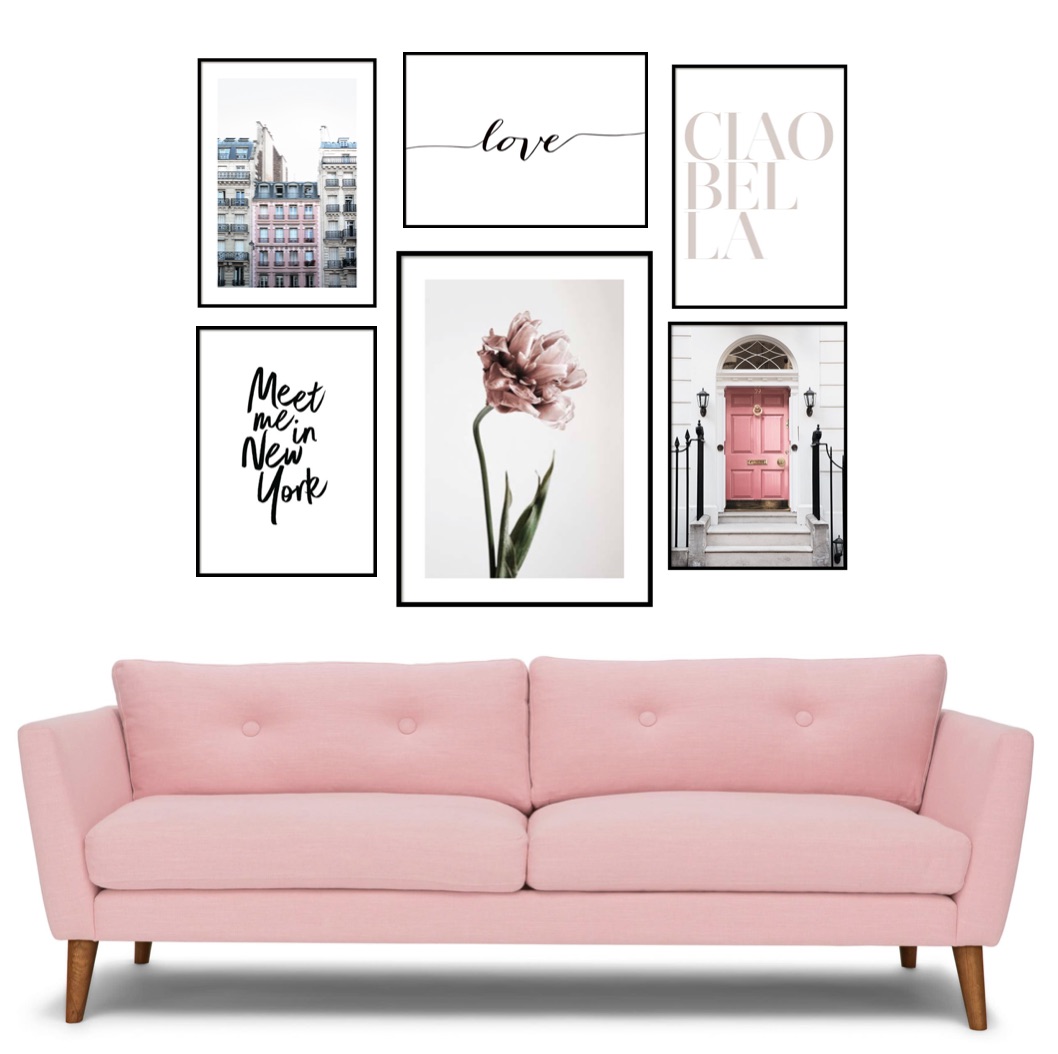
I ended up finding all of these on Desenio. A few other sites that you can check out for prints are Minted and Etsy. Here’s a little breakdown of the meaning behind each print.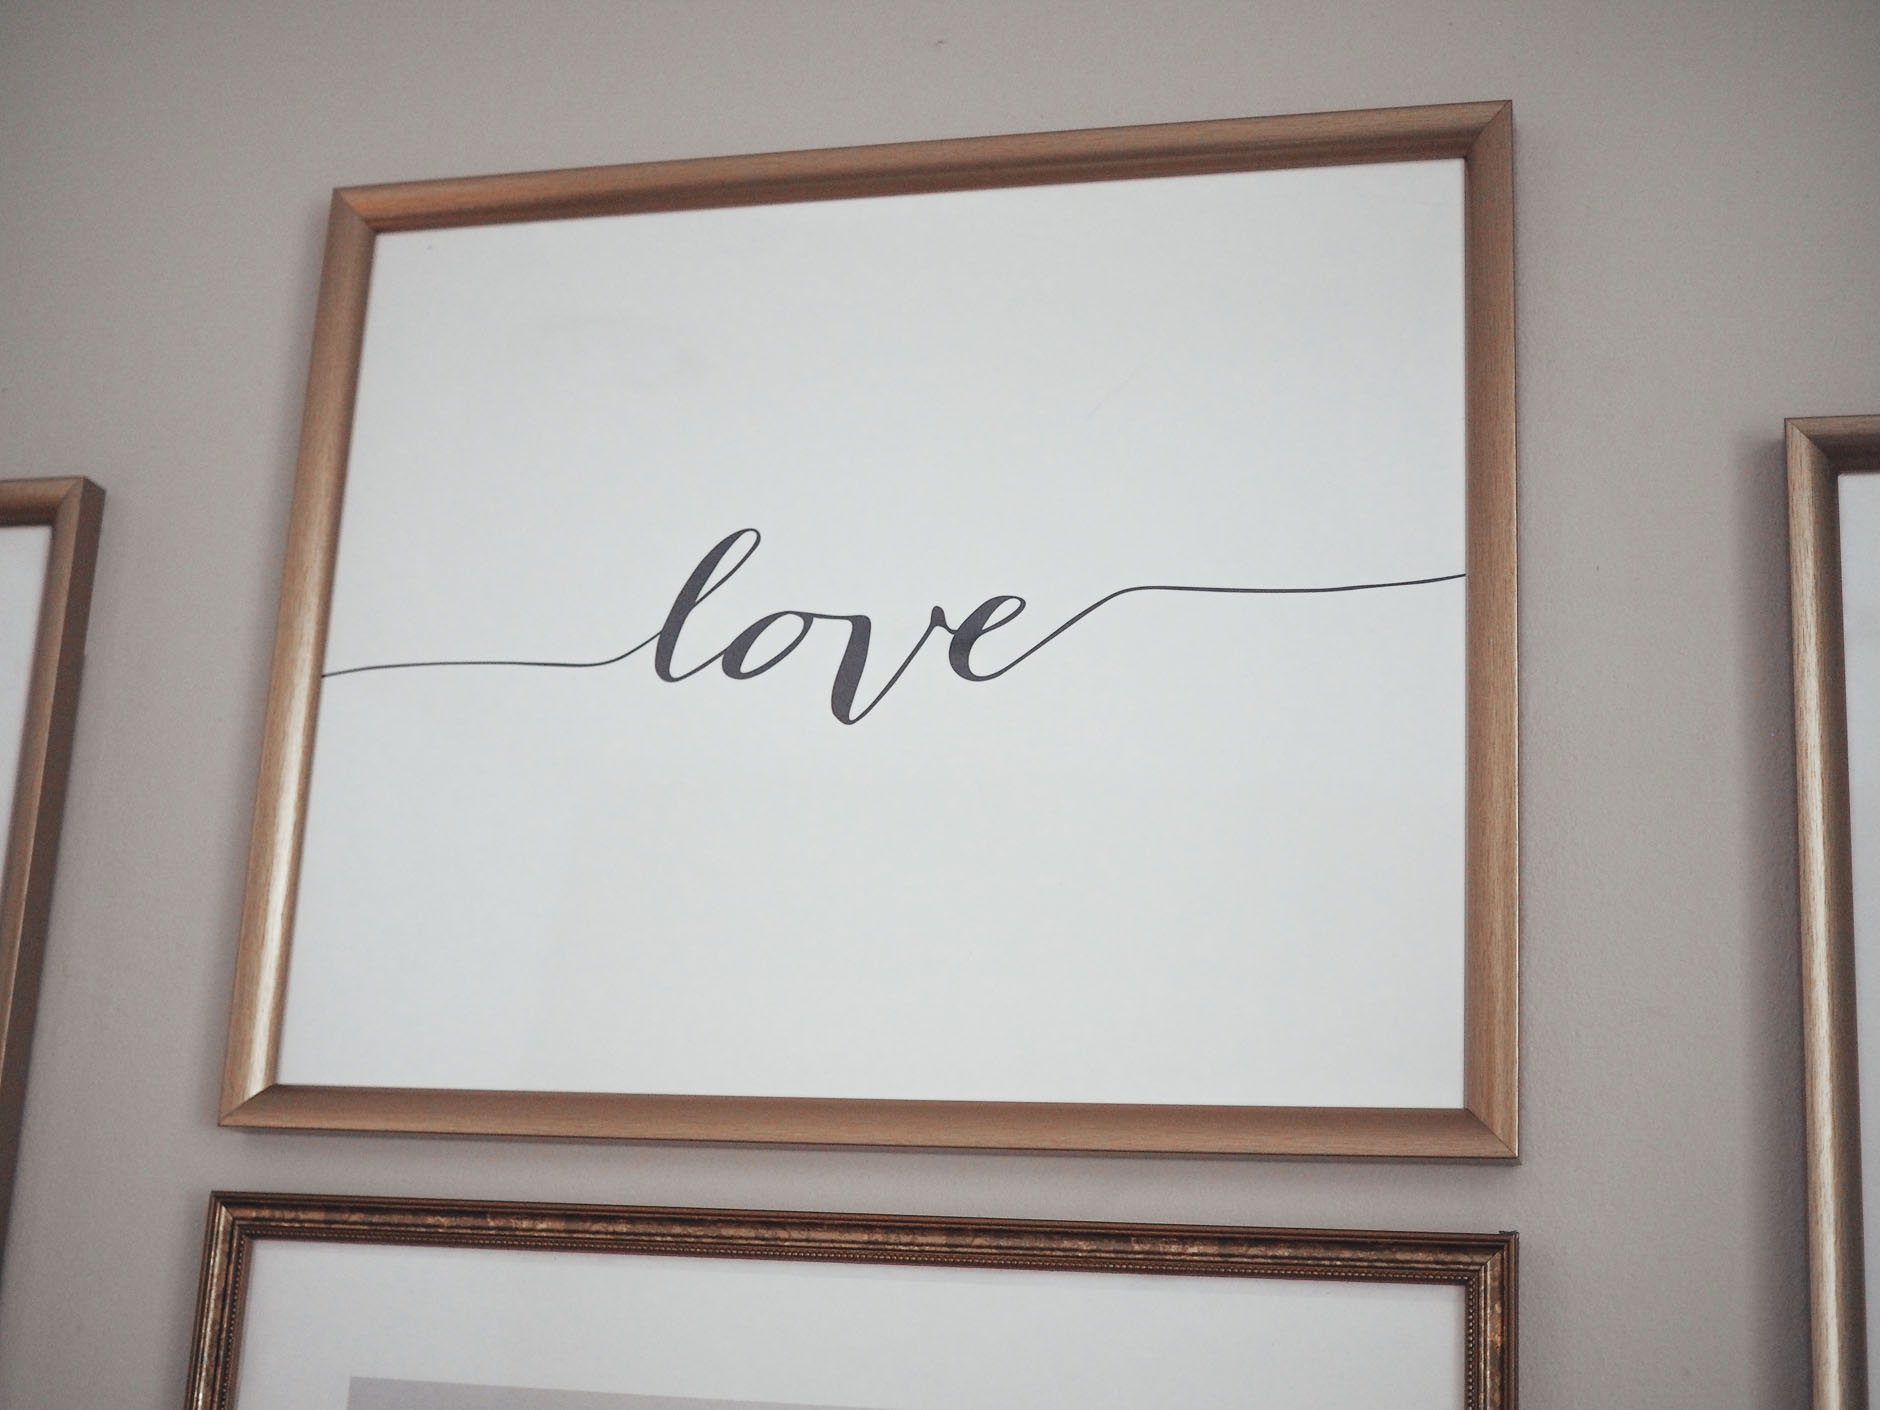 Love – I found this print as soon as I moved and while I didn’t order it right away, I knew that this would become part of my gallery wall. It instantly reminded me of the love tattoo that I have in my father’s handwriting. For me, it brings a little bit of his love into my apartment.
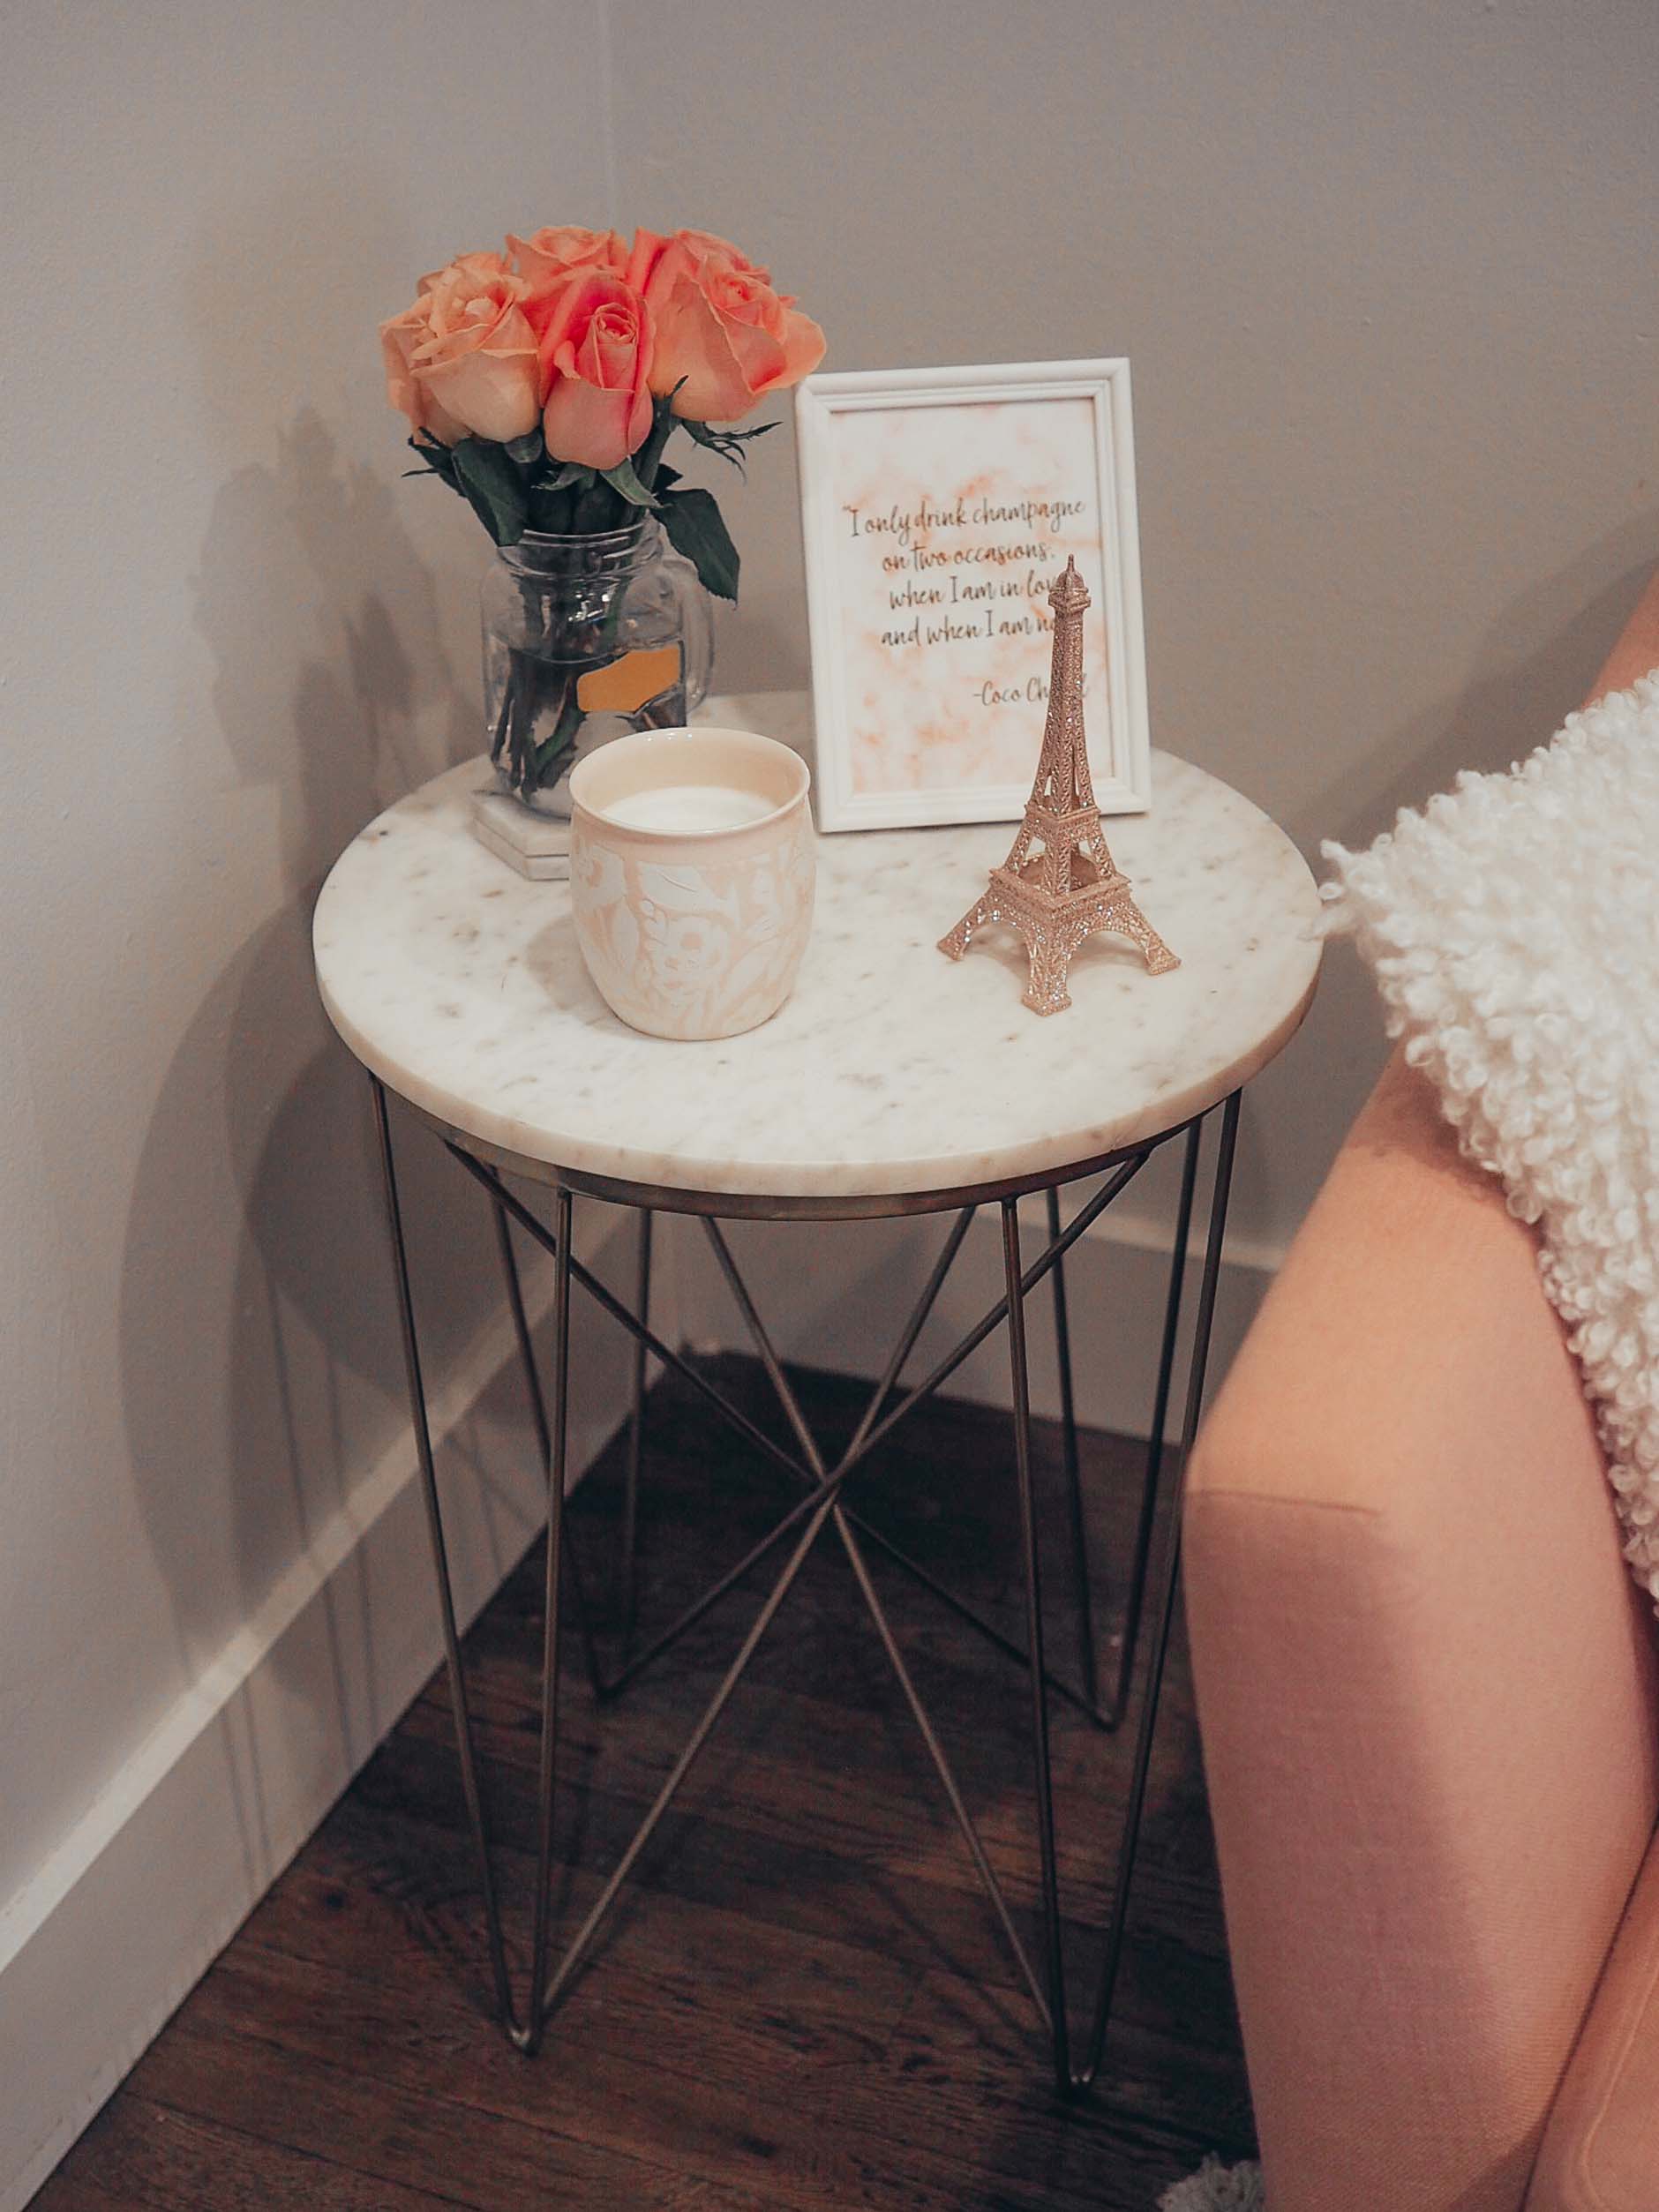
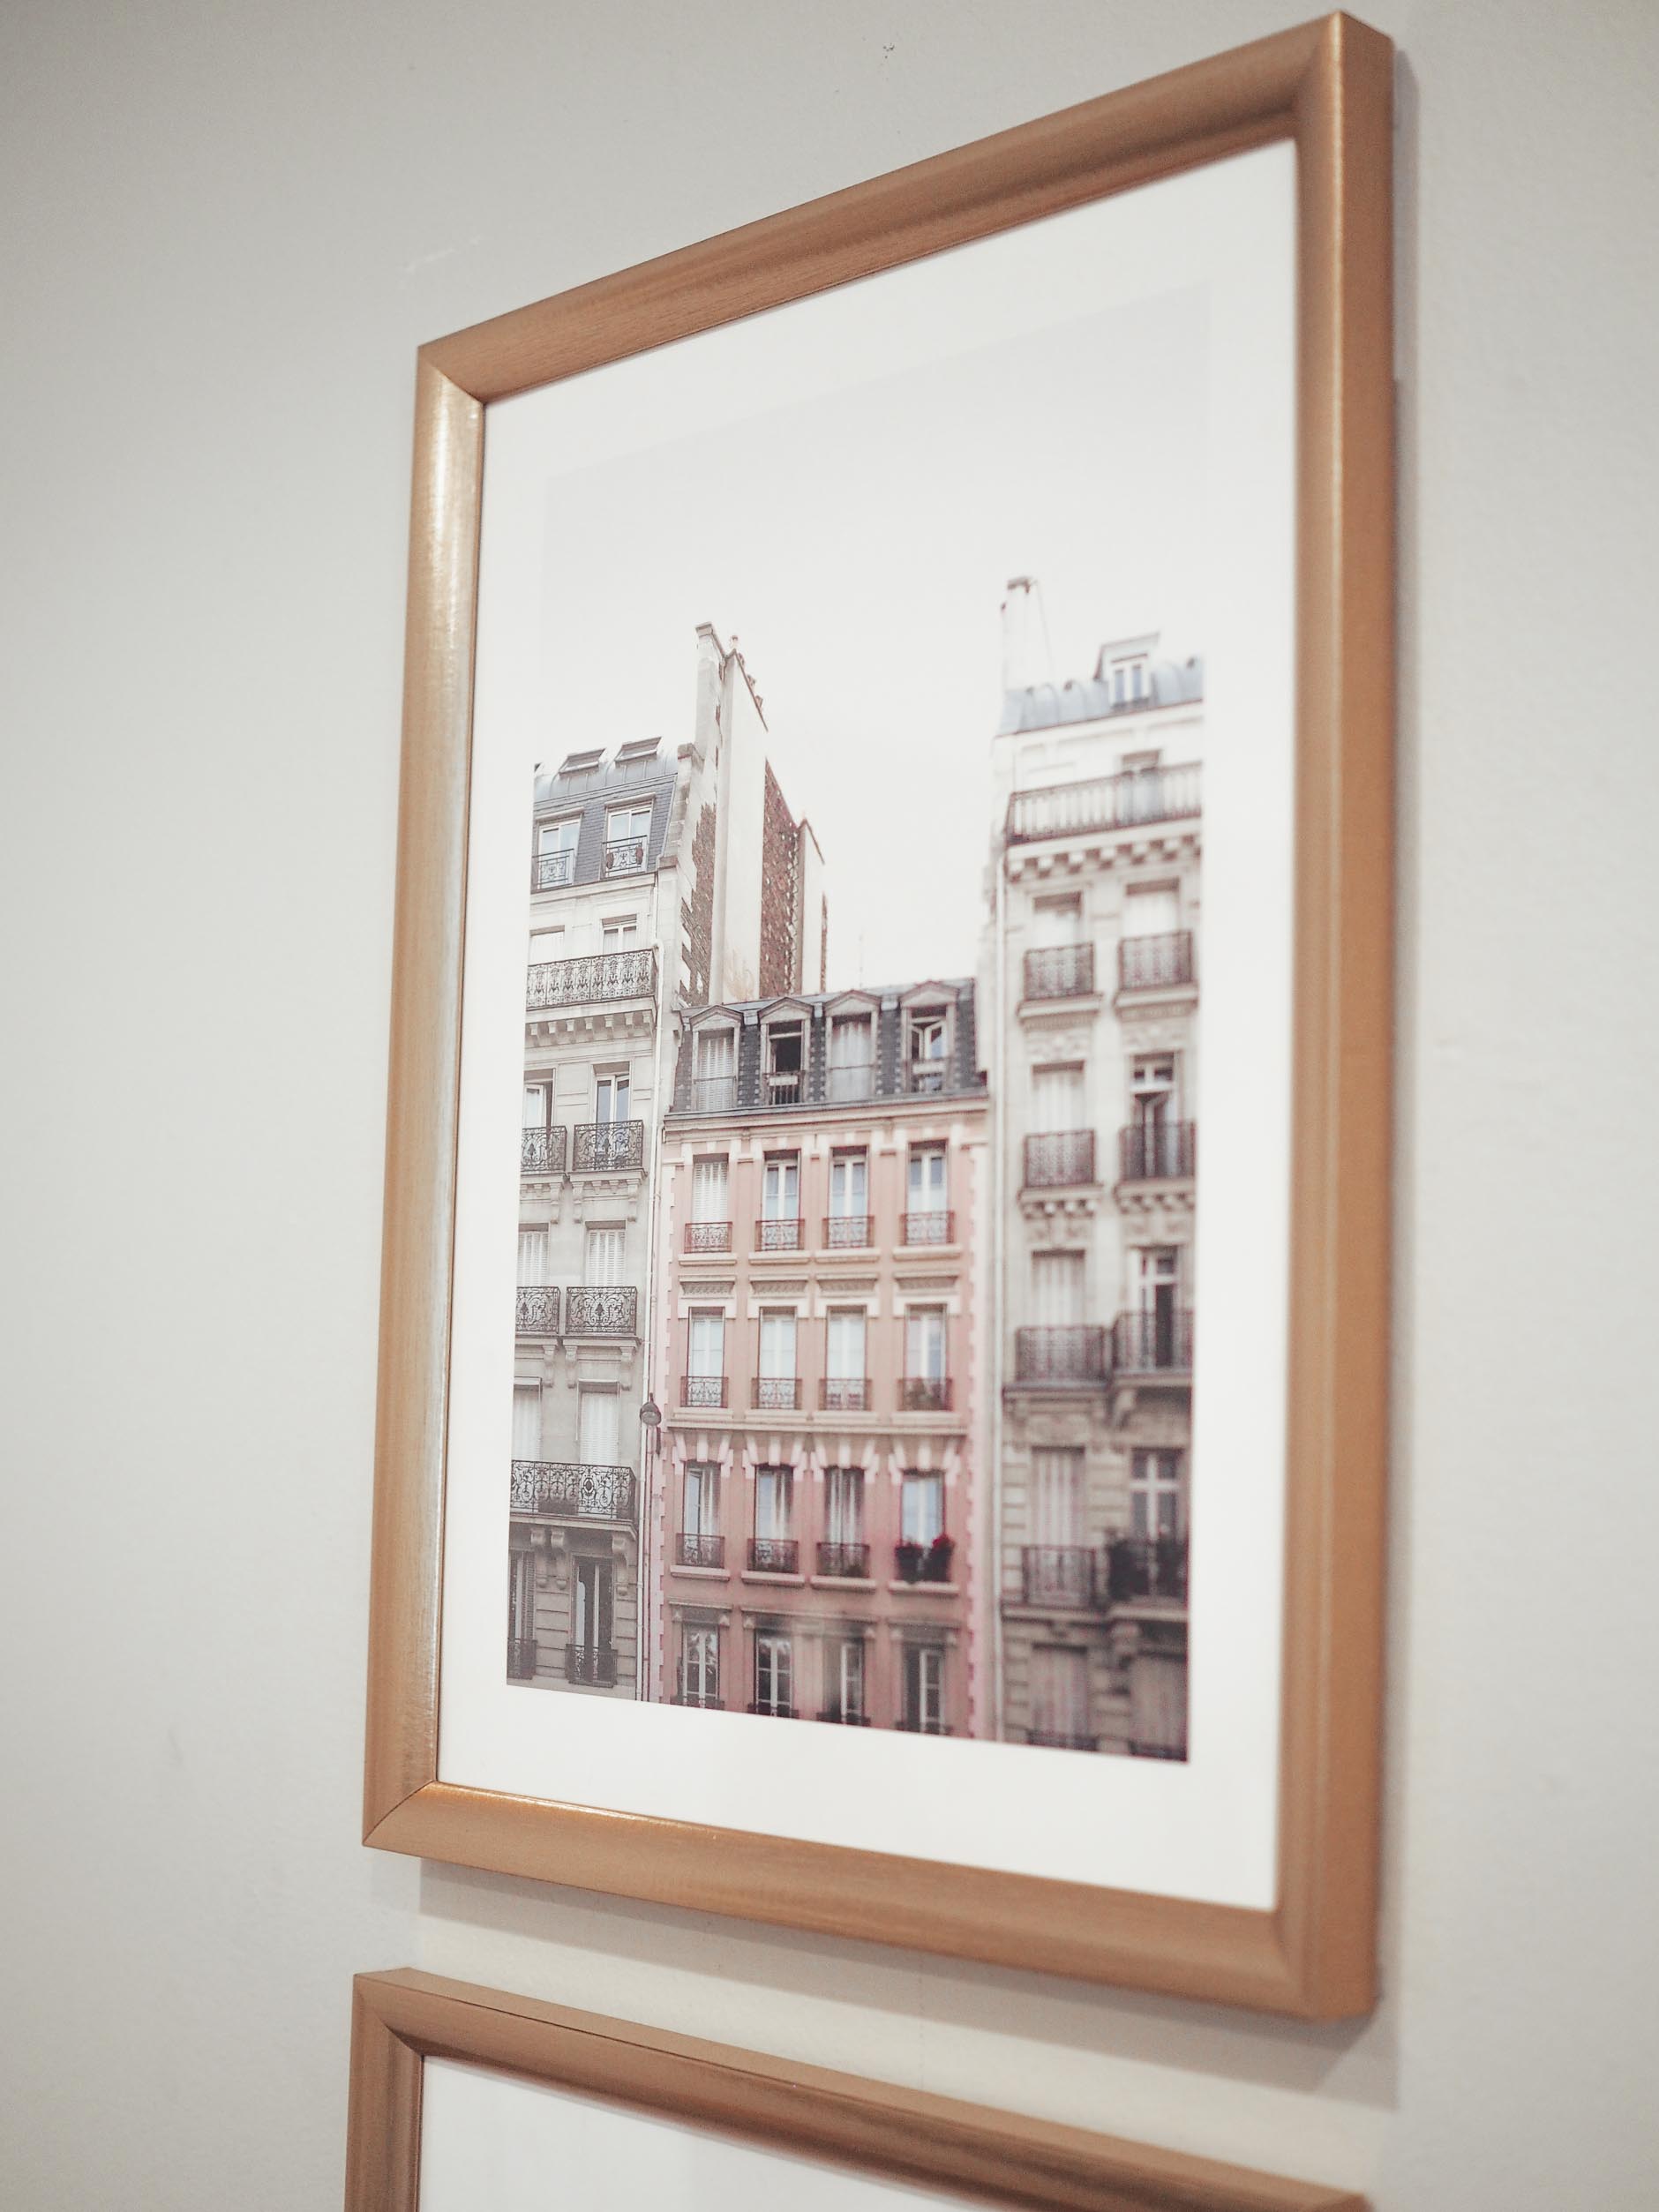 Paris Balconies – I definitely wanted to have some of my travels included, so when I came across this print I knew that it would be the perfect addition. I traveled to Paris alone back in July 2016 and it quickly became one of my favorite cities. I will always remember standing outside on my hotel balcony soaking up that incredible Parisian energy. I also have a beautiful pink Eiffel Tower on my accent table that my aunt got me for Christmas along with a framed quote from Coco Chanel. I definitely have a Parisian theme going on!
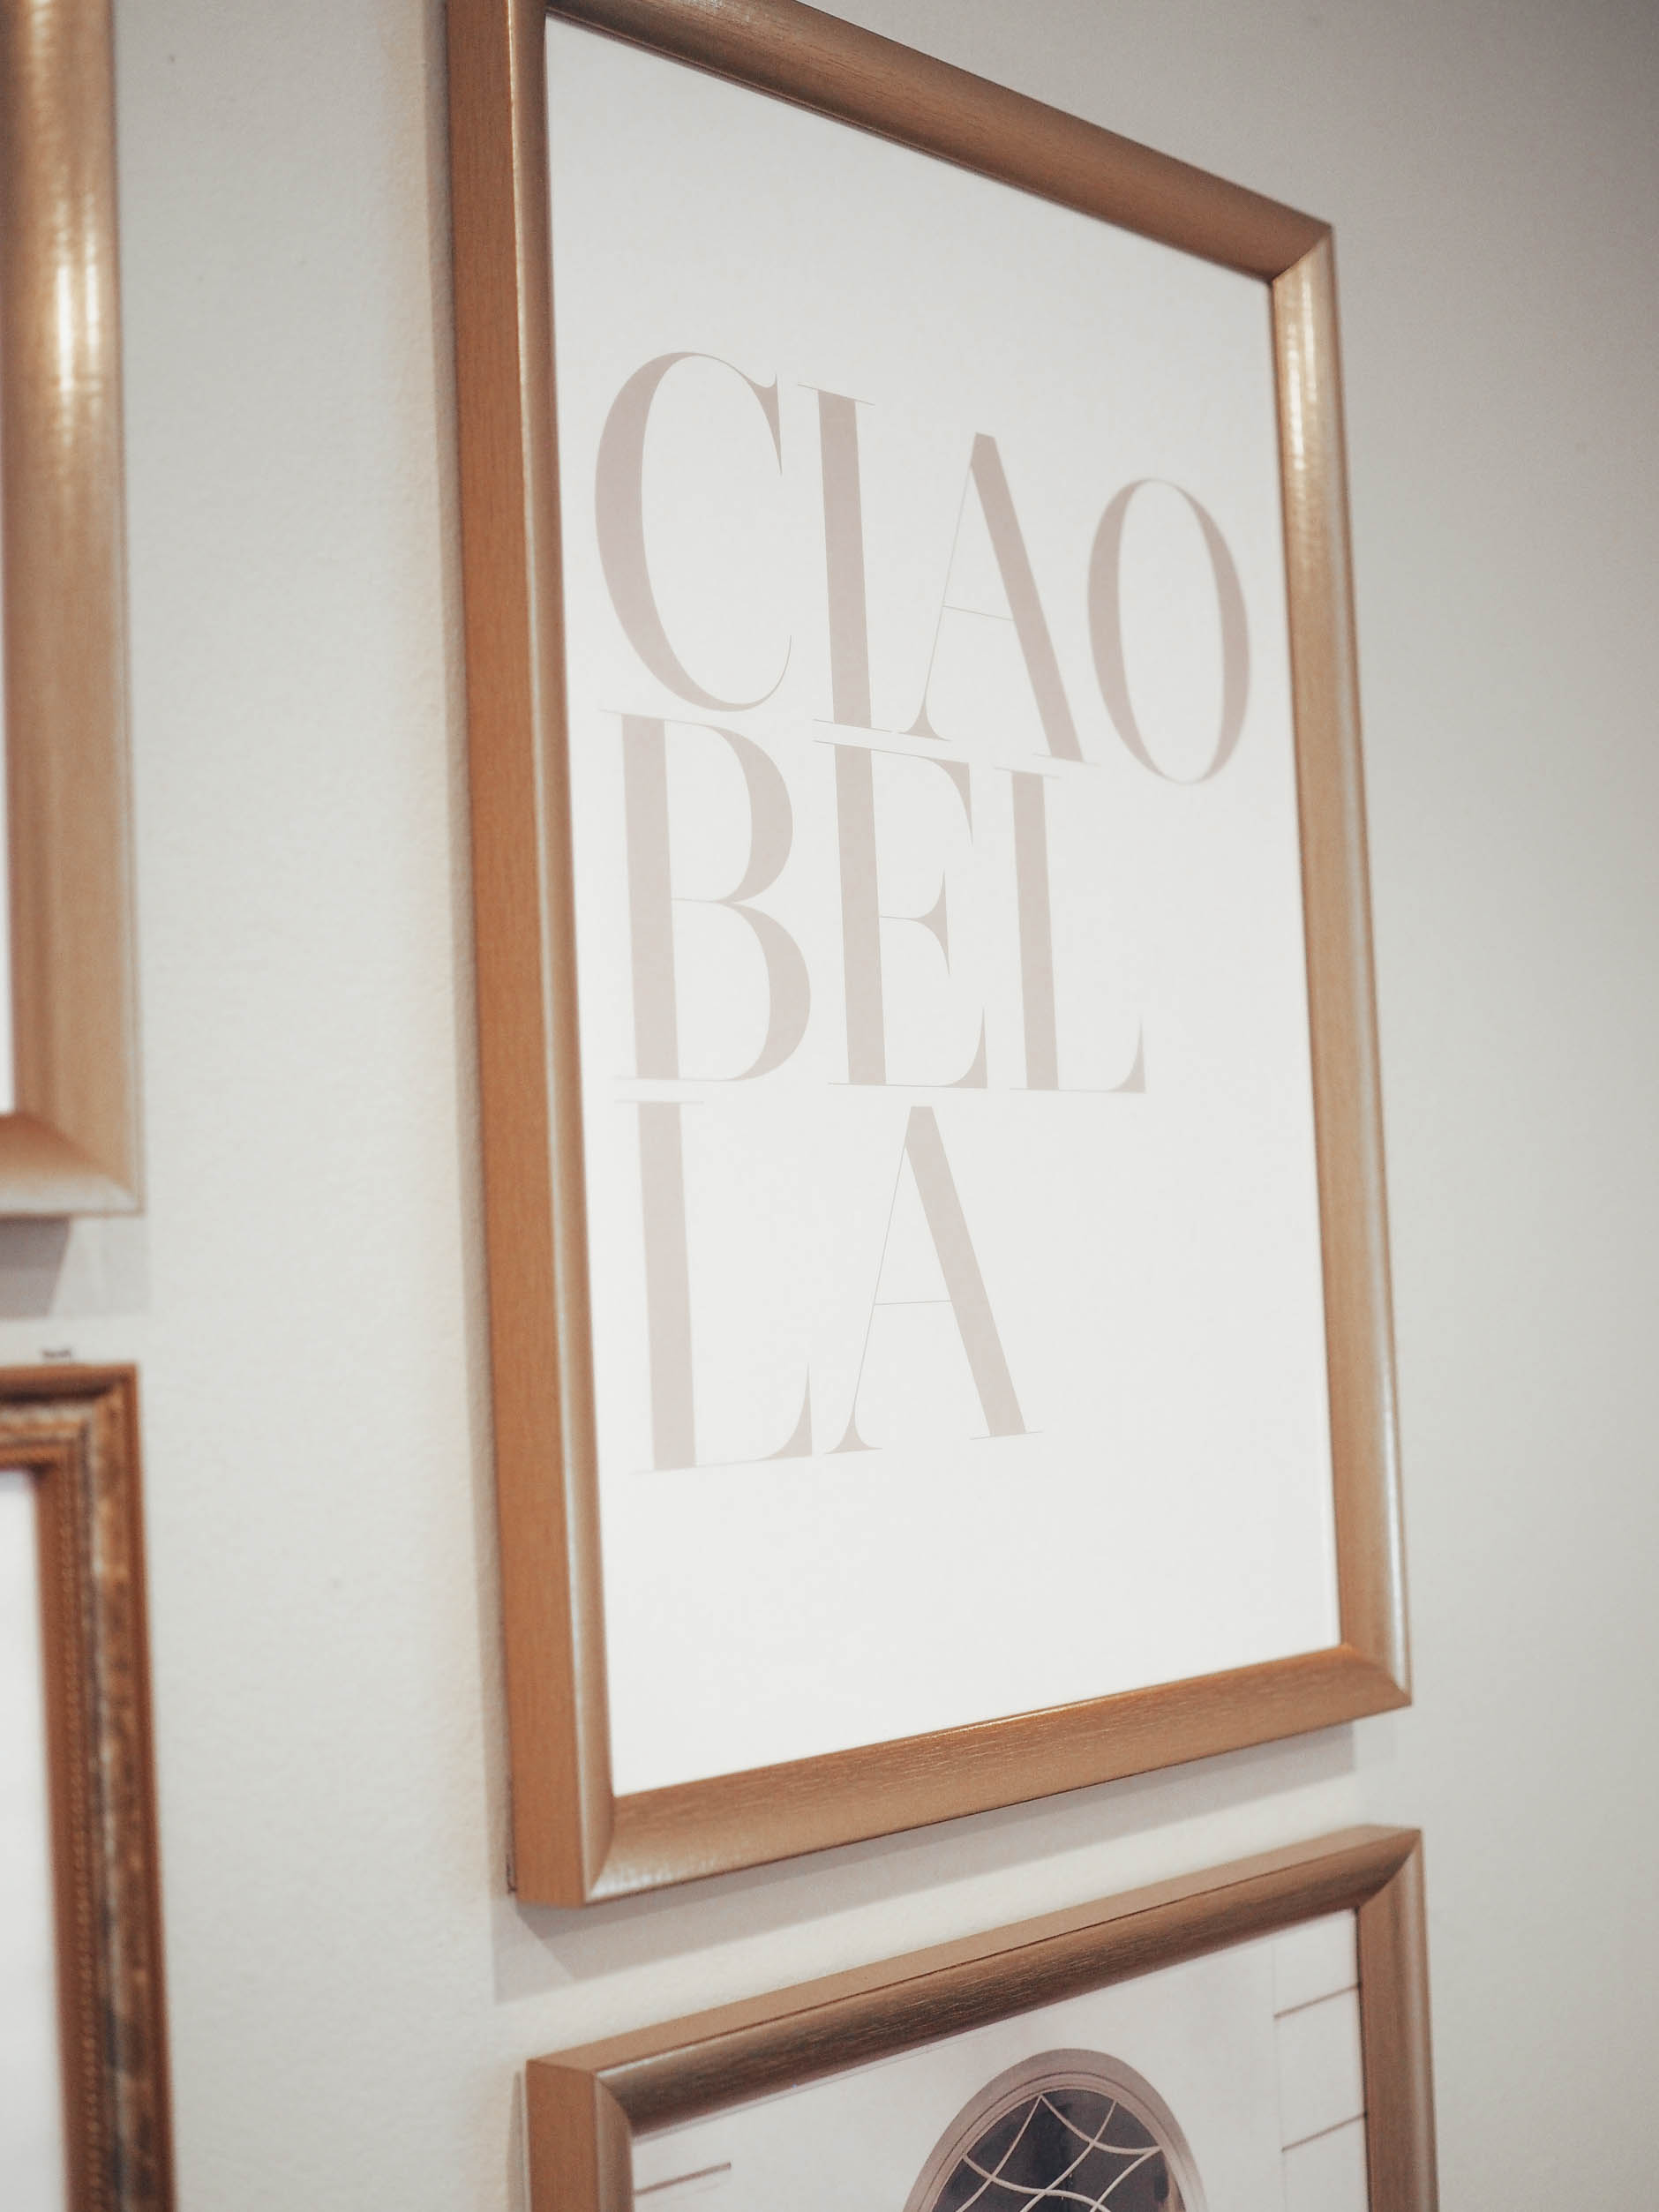 Ciao Bella – In so many ways, I think I’m still coming down from the high of my trip to Italy back in August. This print symbolizes that two and a half week journey traveling from city to city where I must have heard, “Ciao bella” over a dozen times. Whenever I look at it, I think of that adventure.
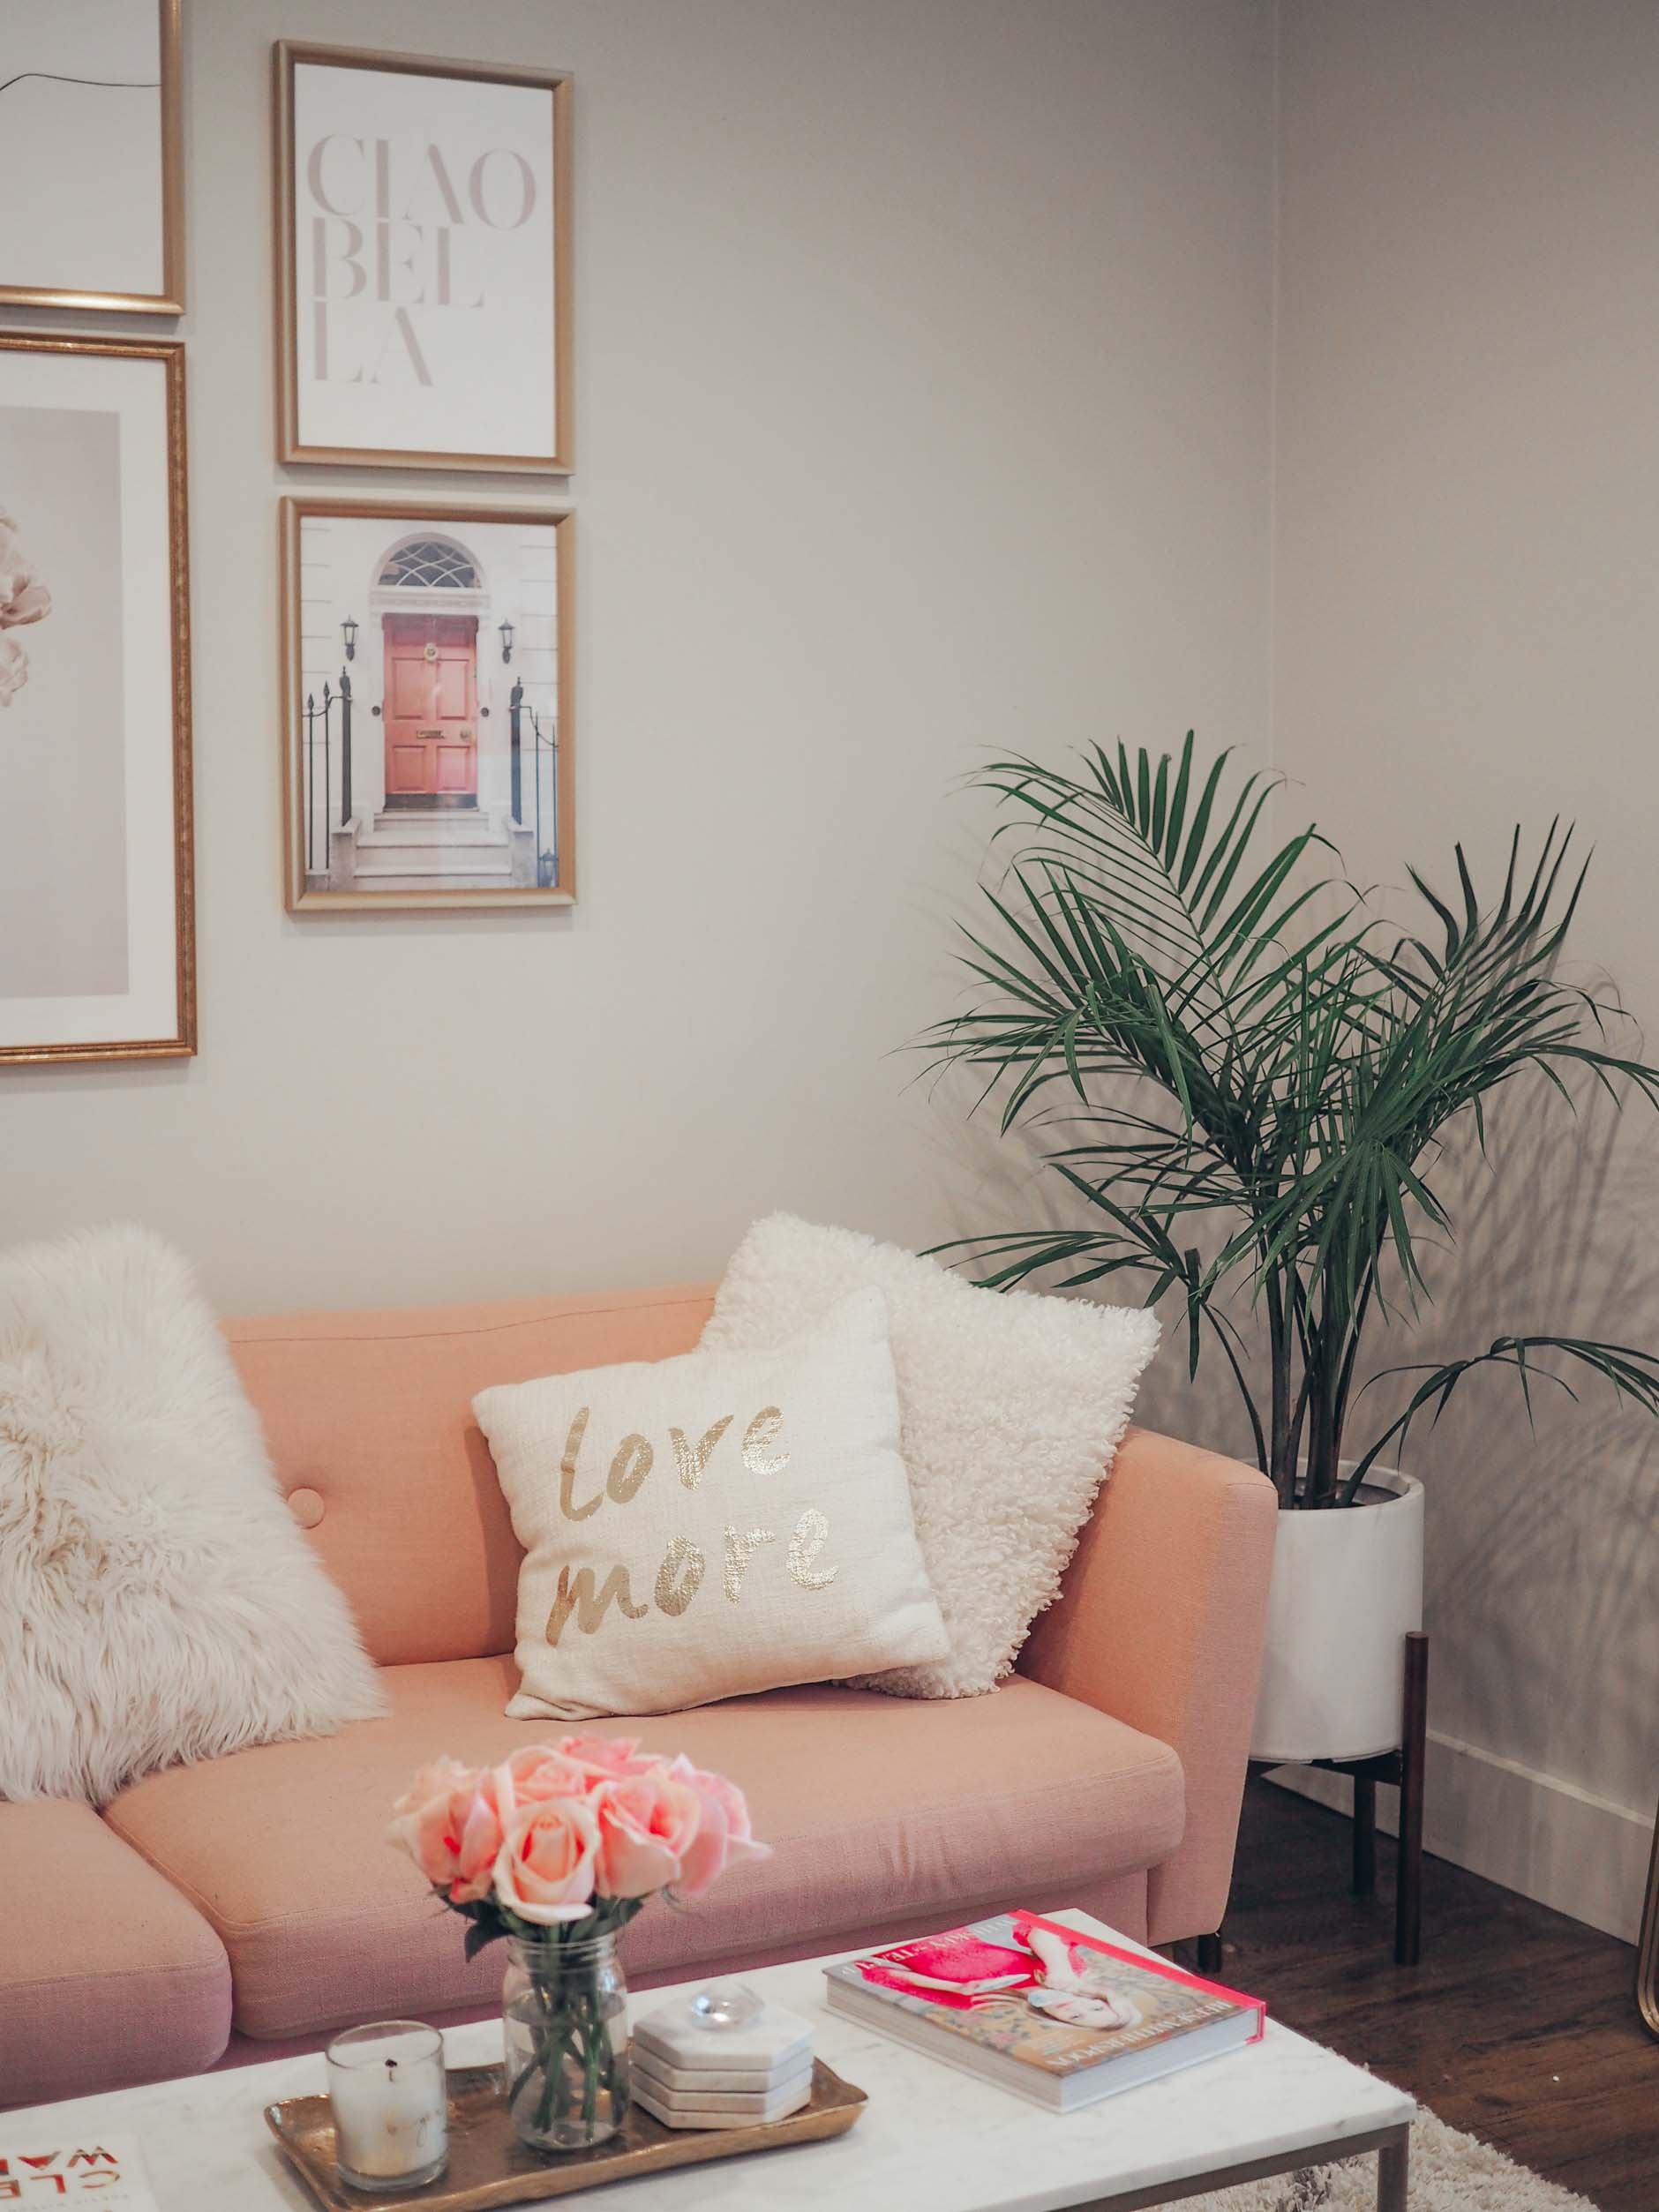
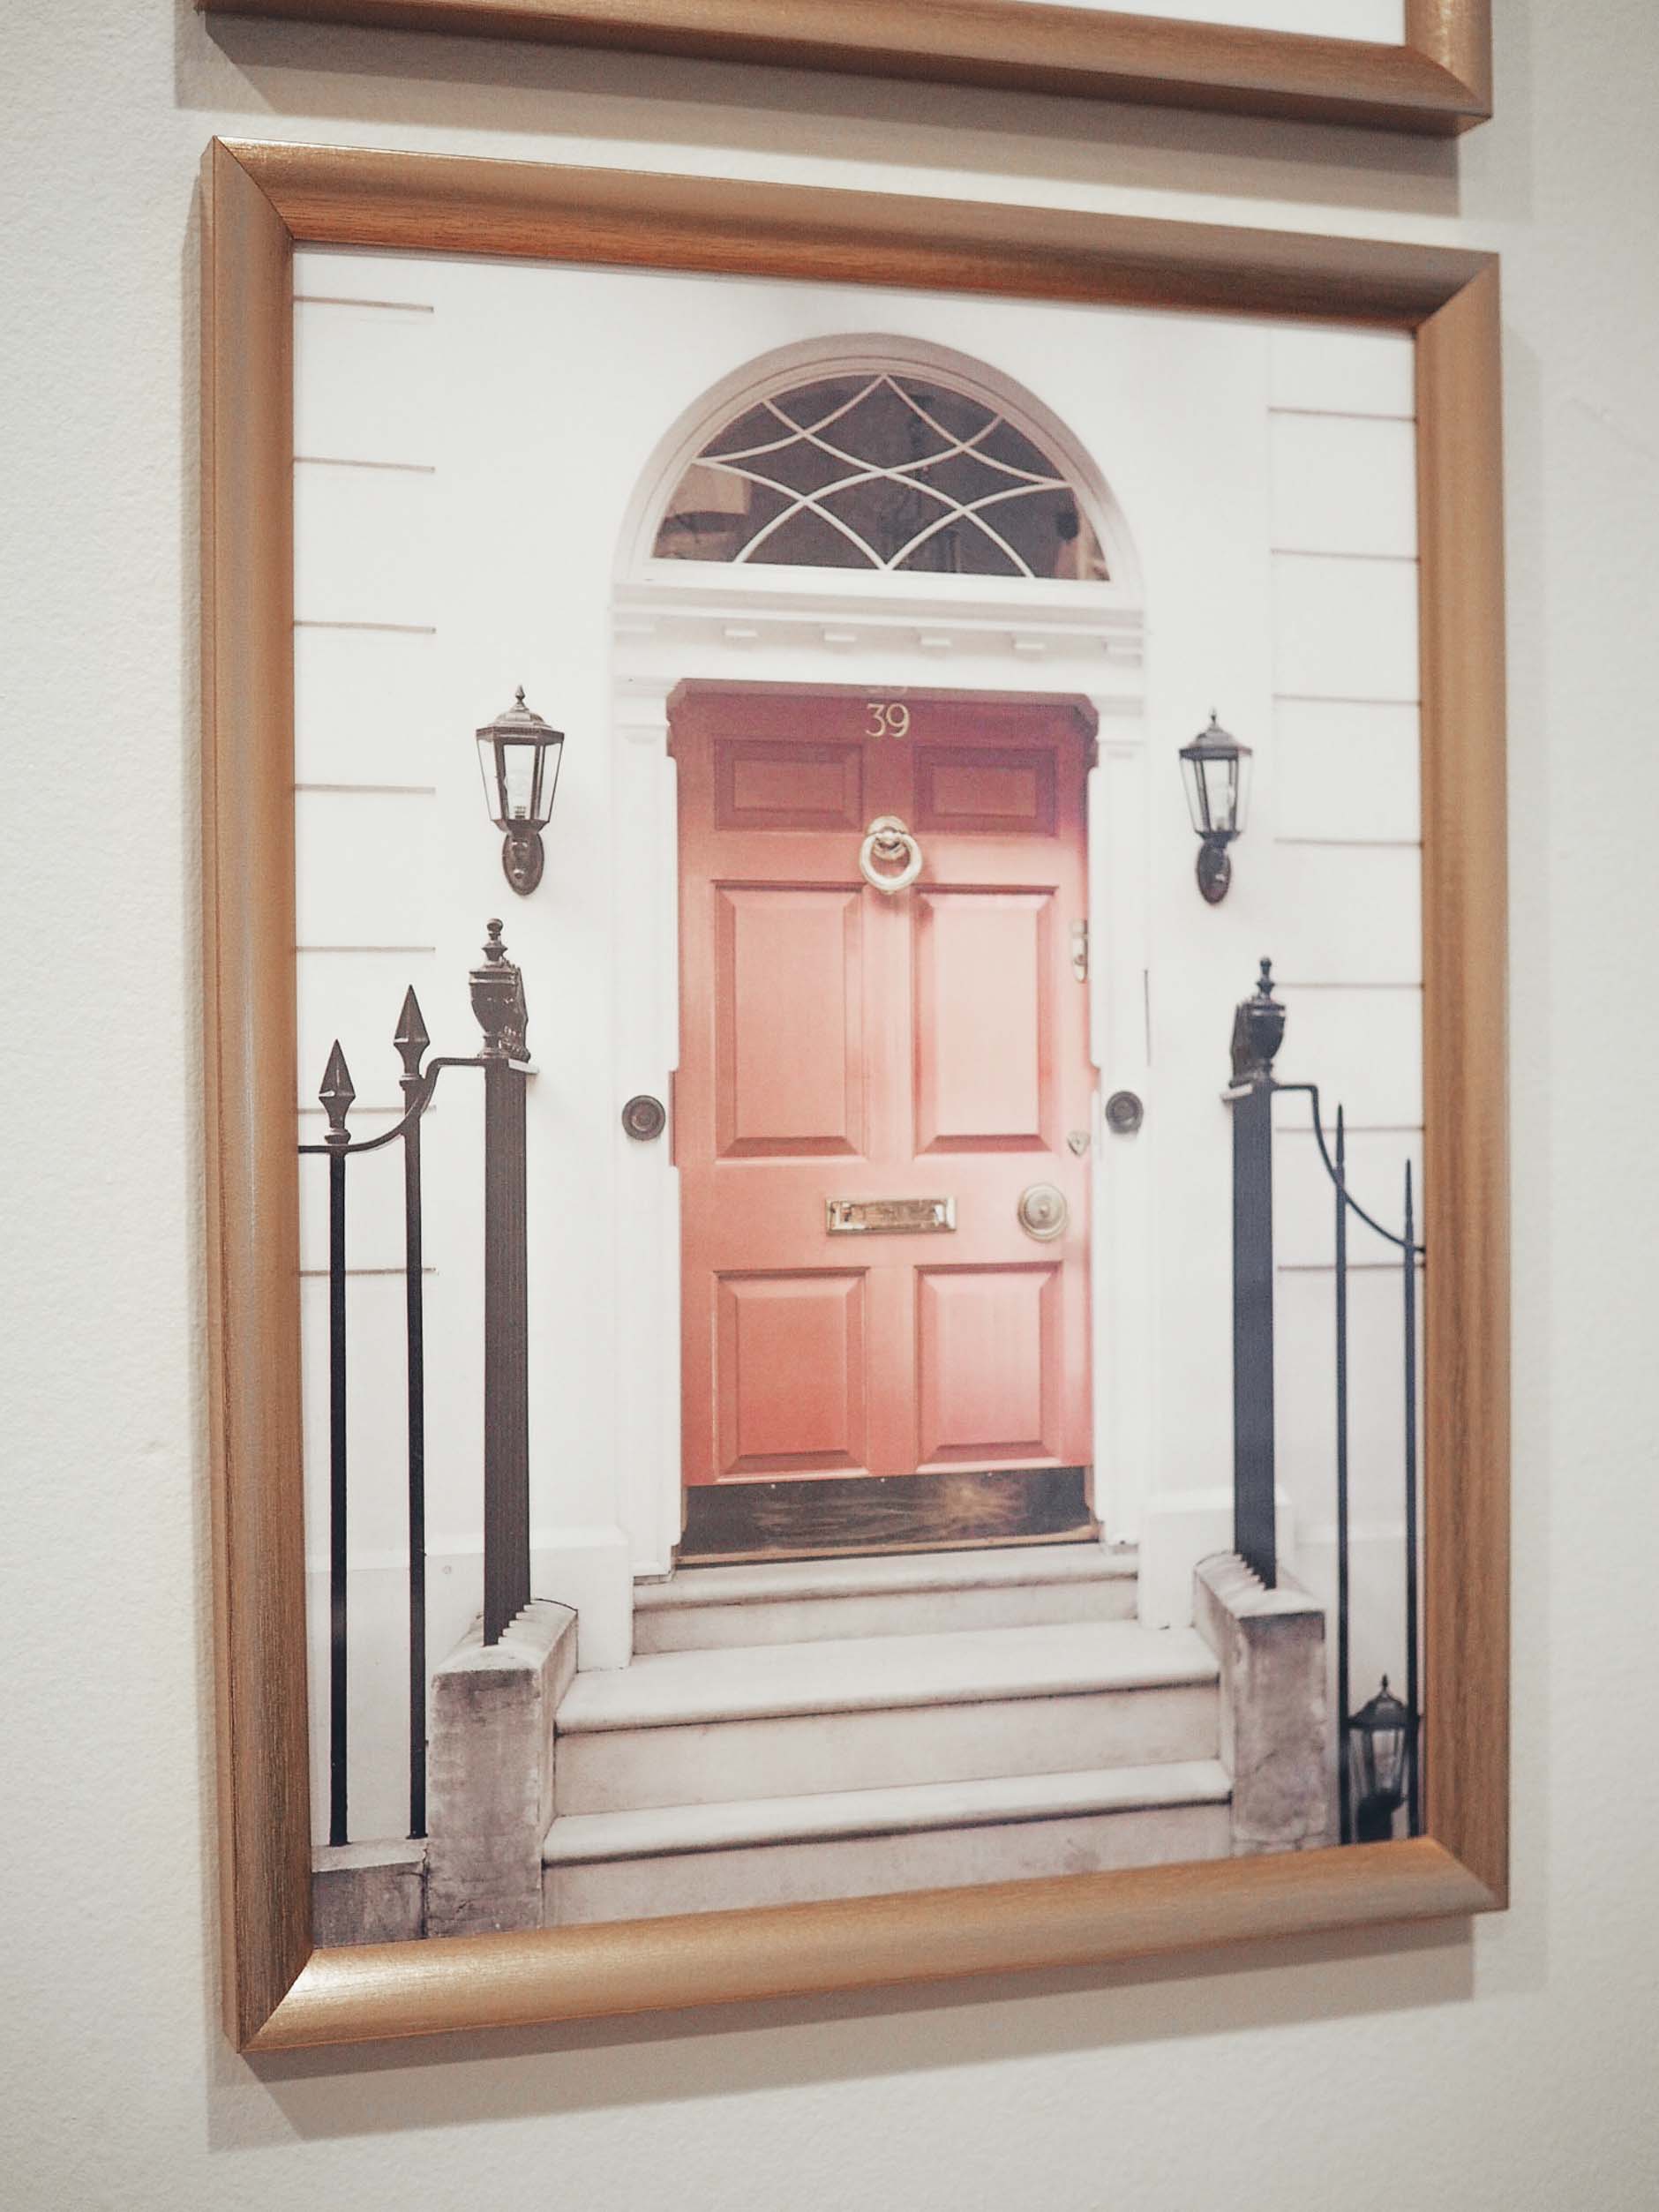 Pink Door – This print has two meanings, making me love it that much more. For starters it’s a pink door from a home in London, which instantly brings me back to all of my memories of traveling there in 2016. The number on the door is 39, which is the same number as my mom’s house – the home I grew up in and lived in all my life.
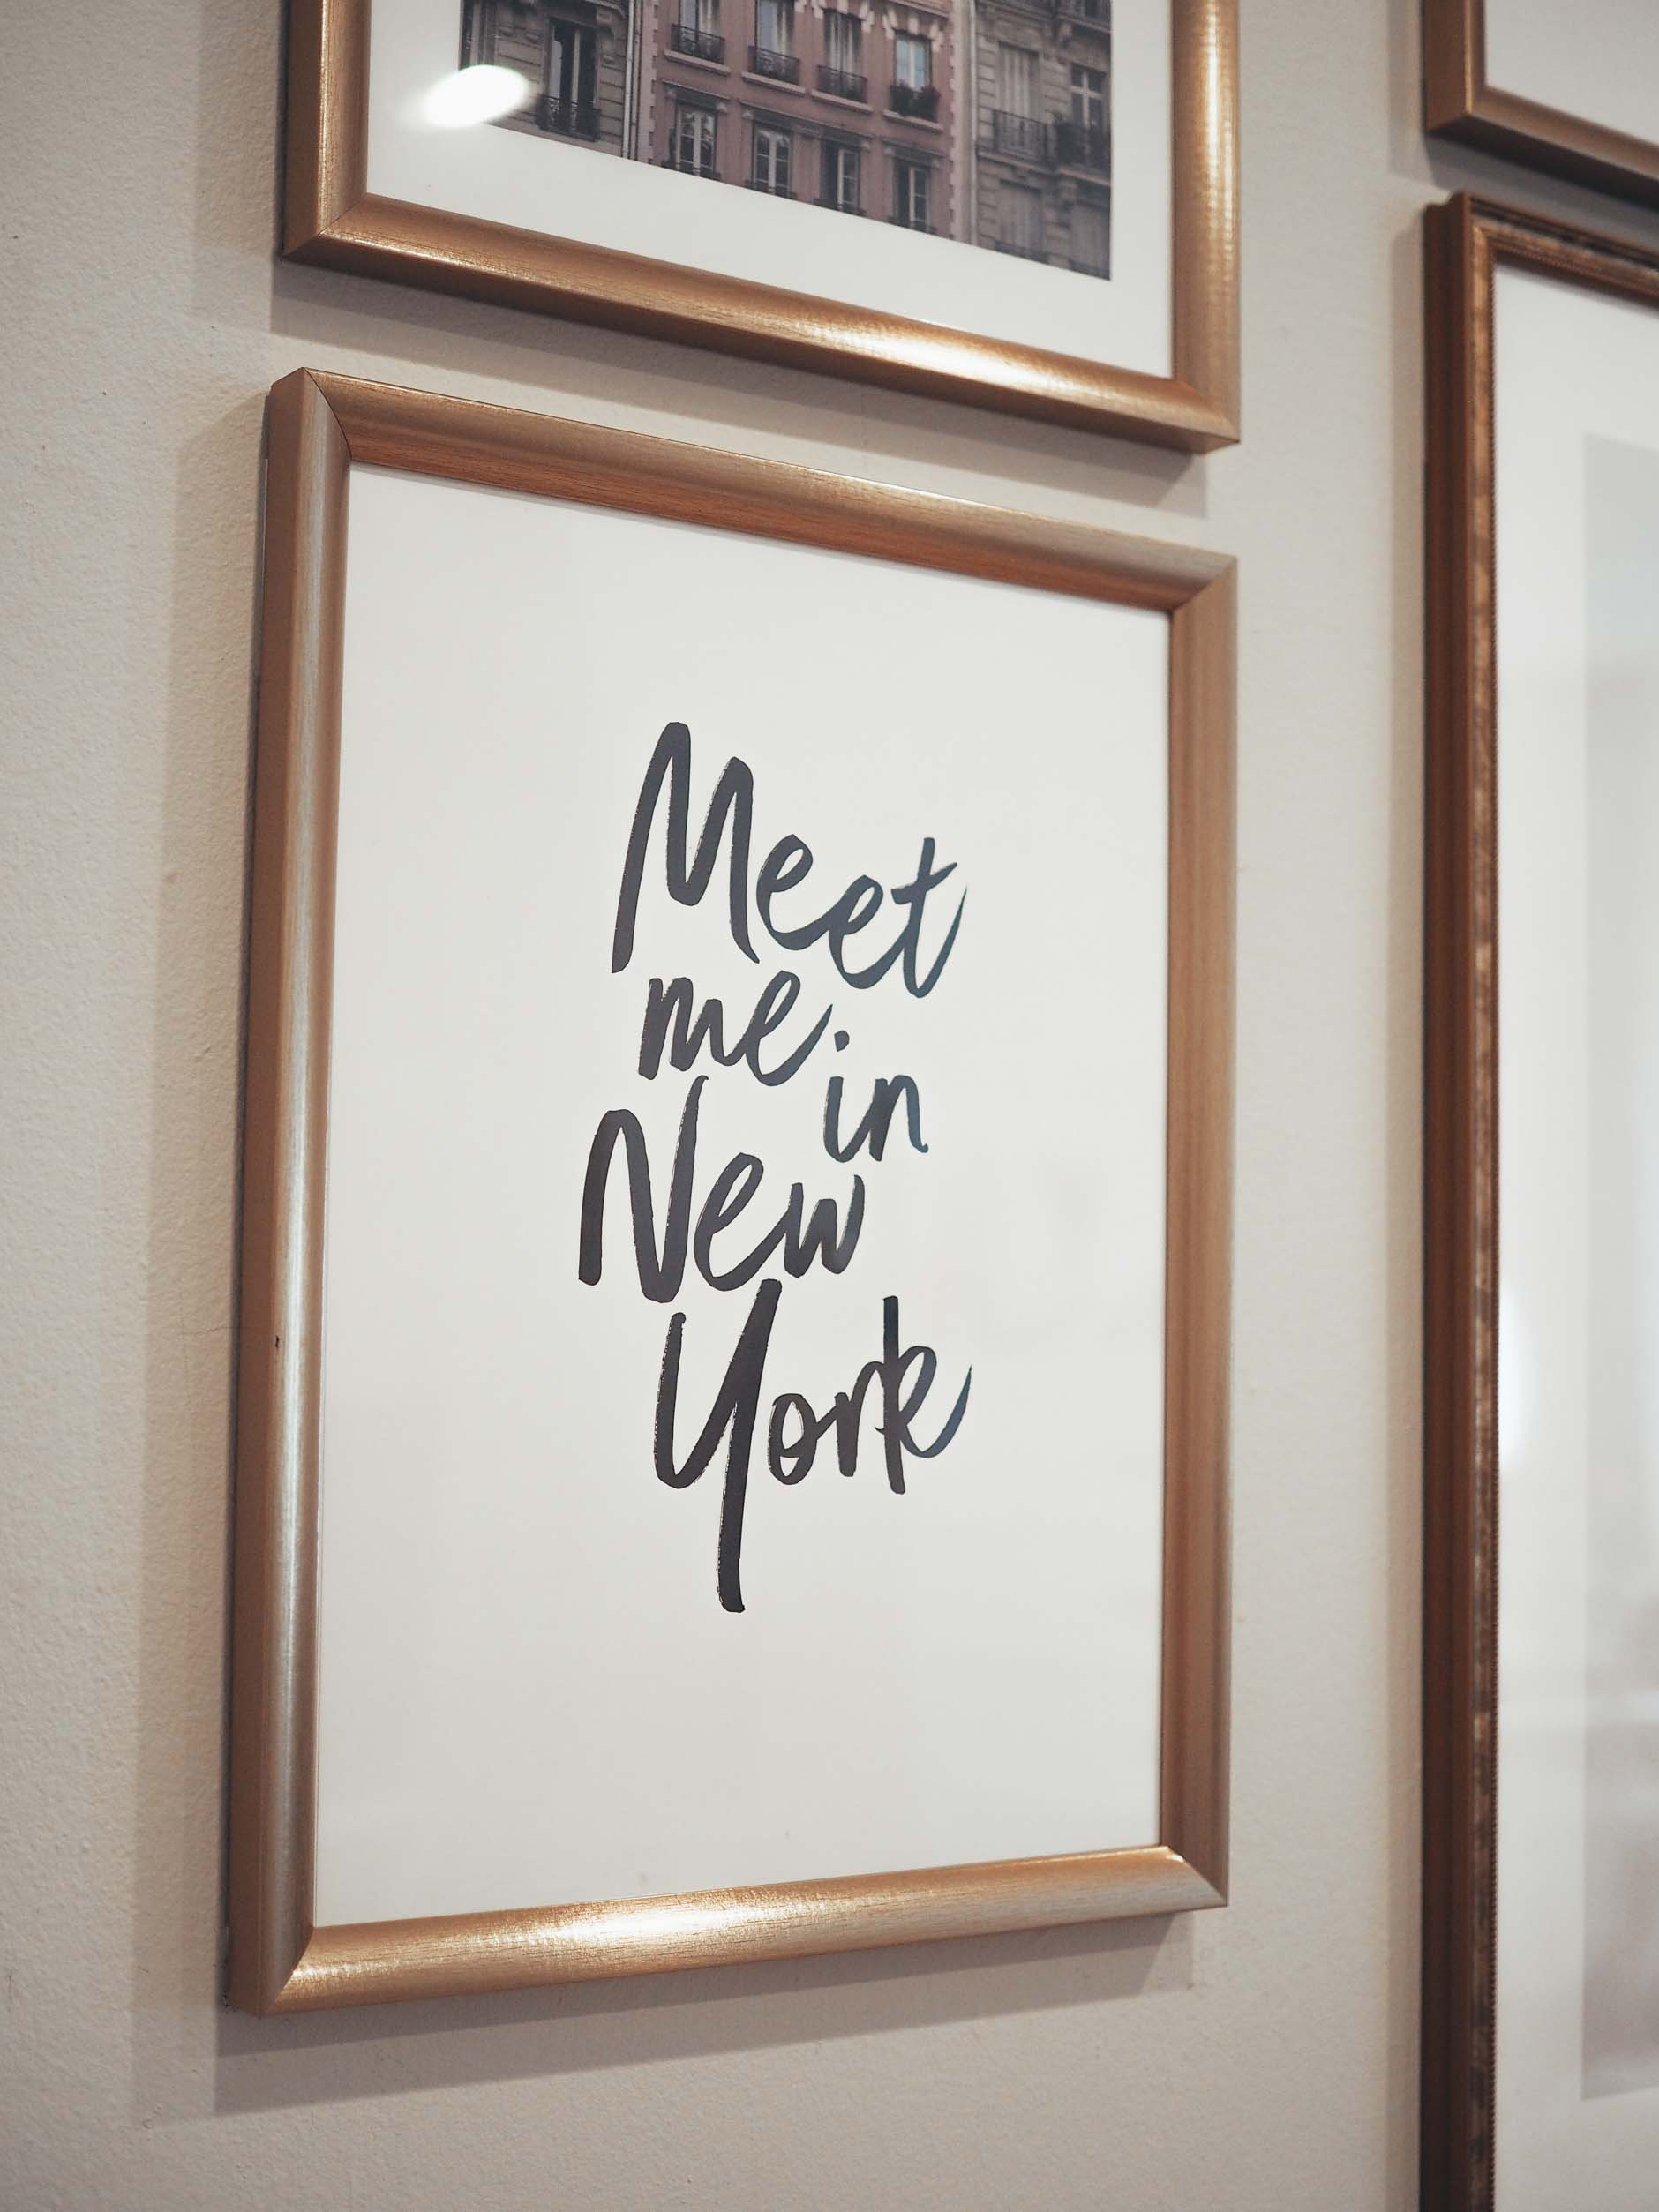 Meet Me In New York – I wanted to incorporate a little bit of NYC in some way, especially since living here had been my dream for most of my adult life. There were so many different prints to choose from, but for some reason this one seemed to speak to me the most. It’s actually one of my favorites.
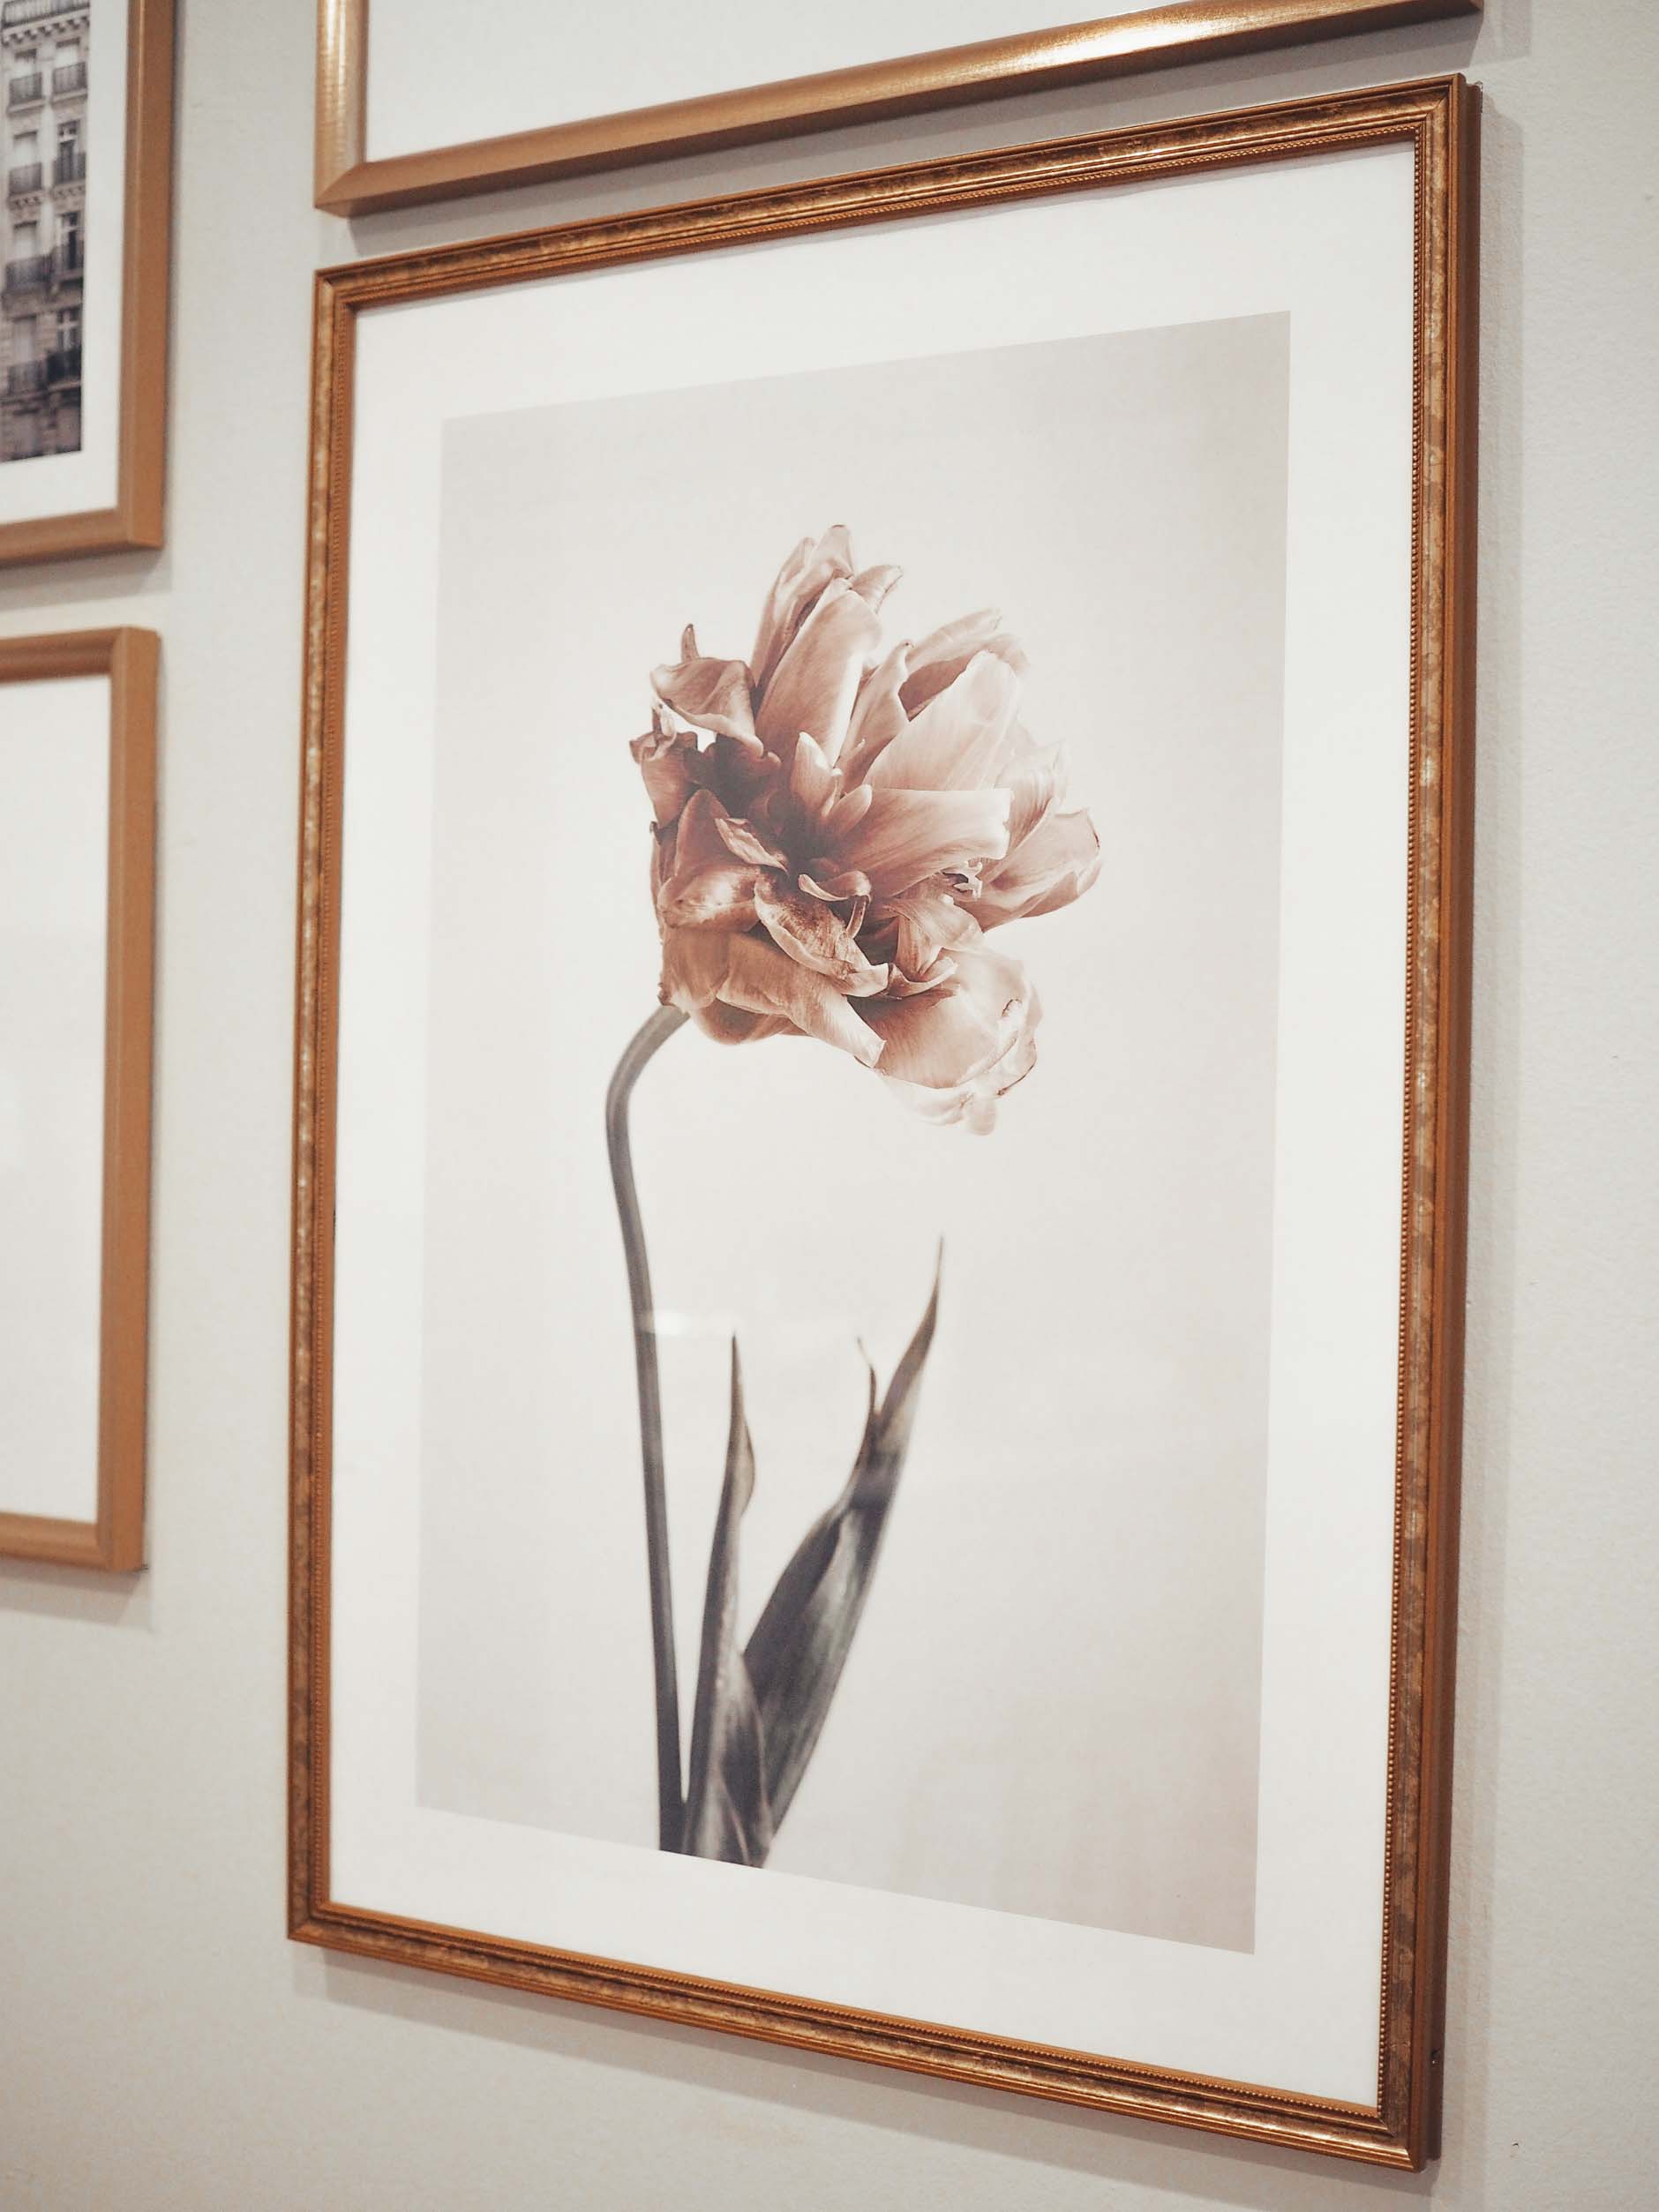
Pink Flower – I chose this piece as the focal point of my gallery wall for a few different reasons. I love the touch of femininity that it brings to the space. There were a ton of different pink flower prints, but this one speaks to me in a way that says, “I’m still blooming.” I think that this gallery wall represents not only my love for travel, but personal growth and self-discovery as well.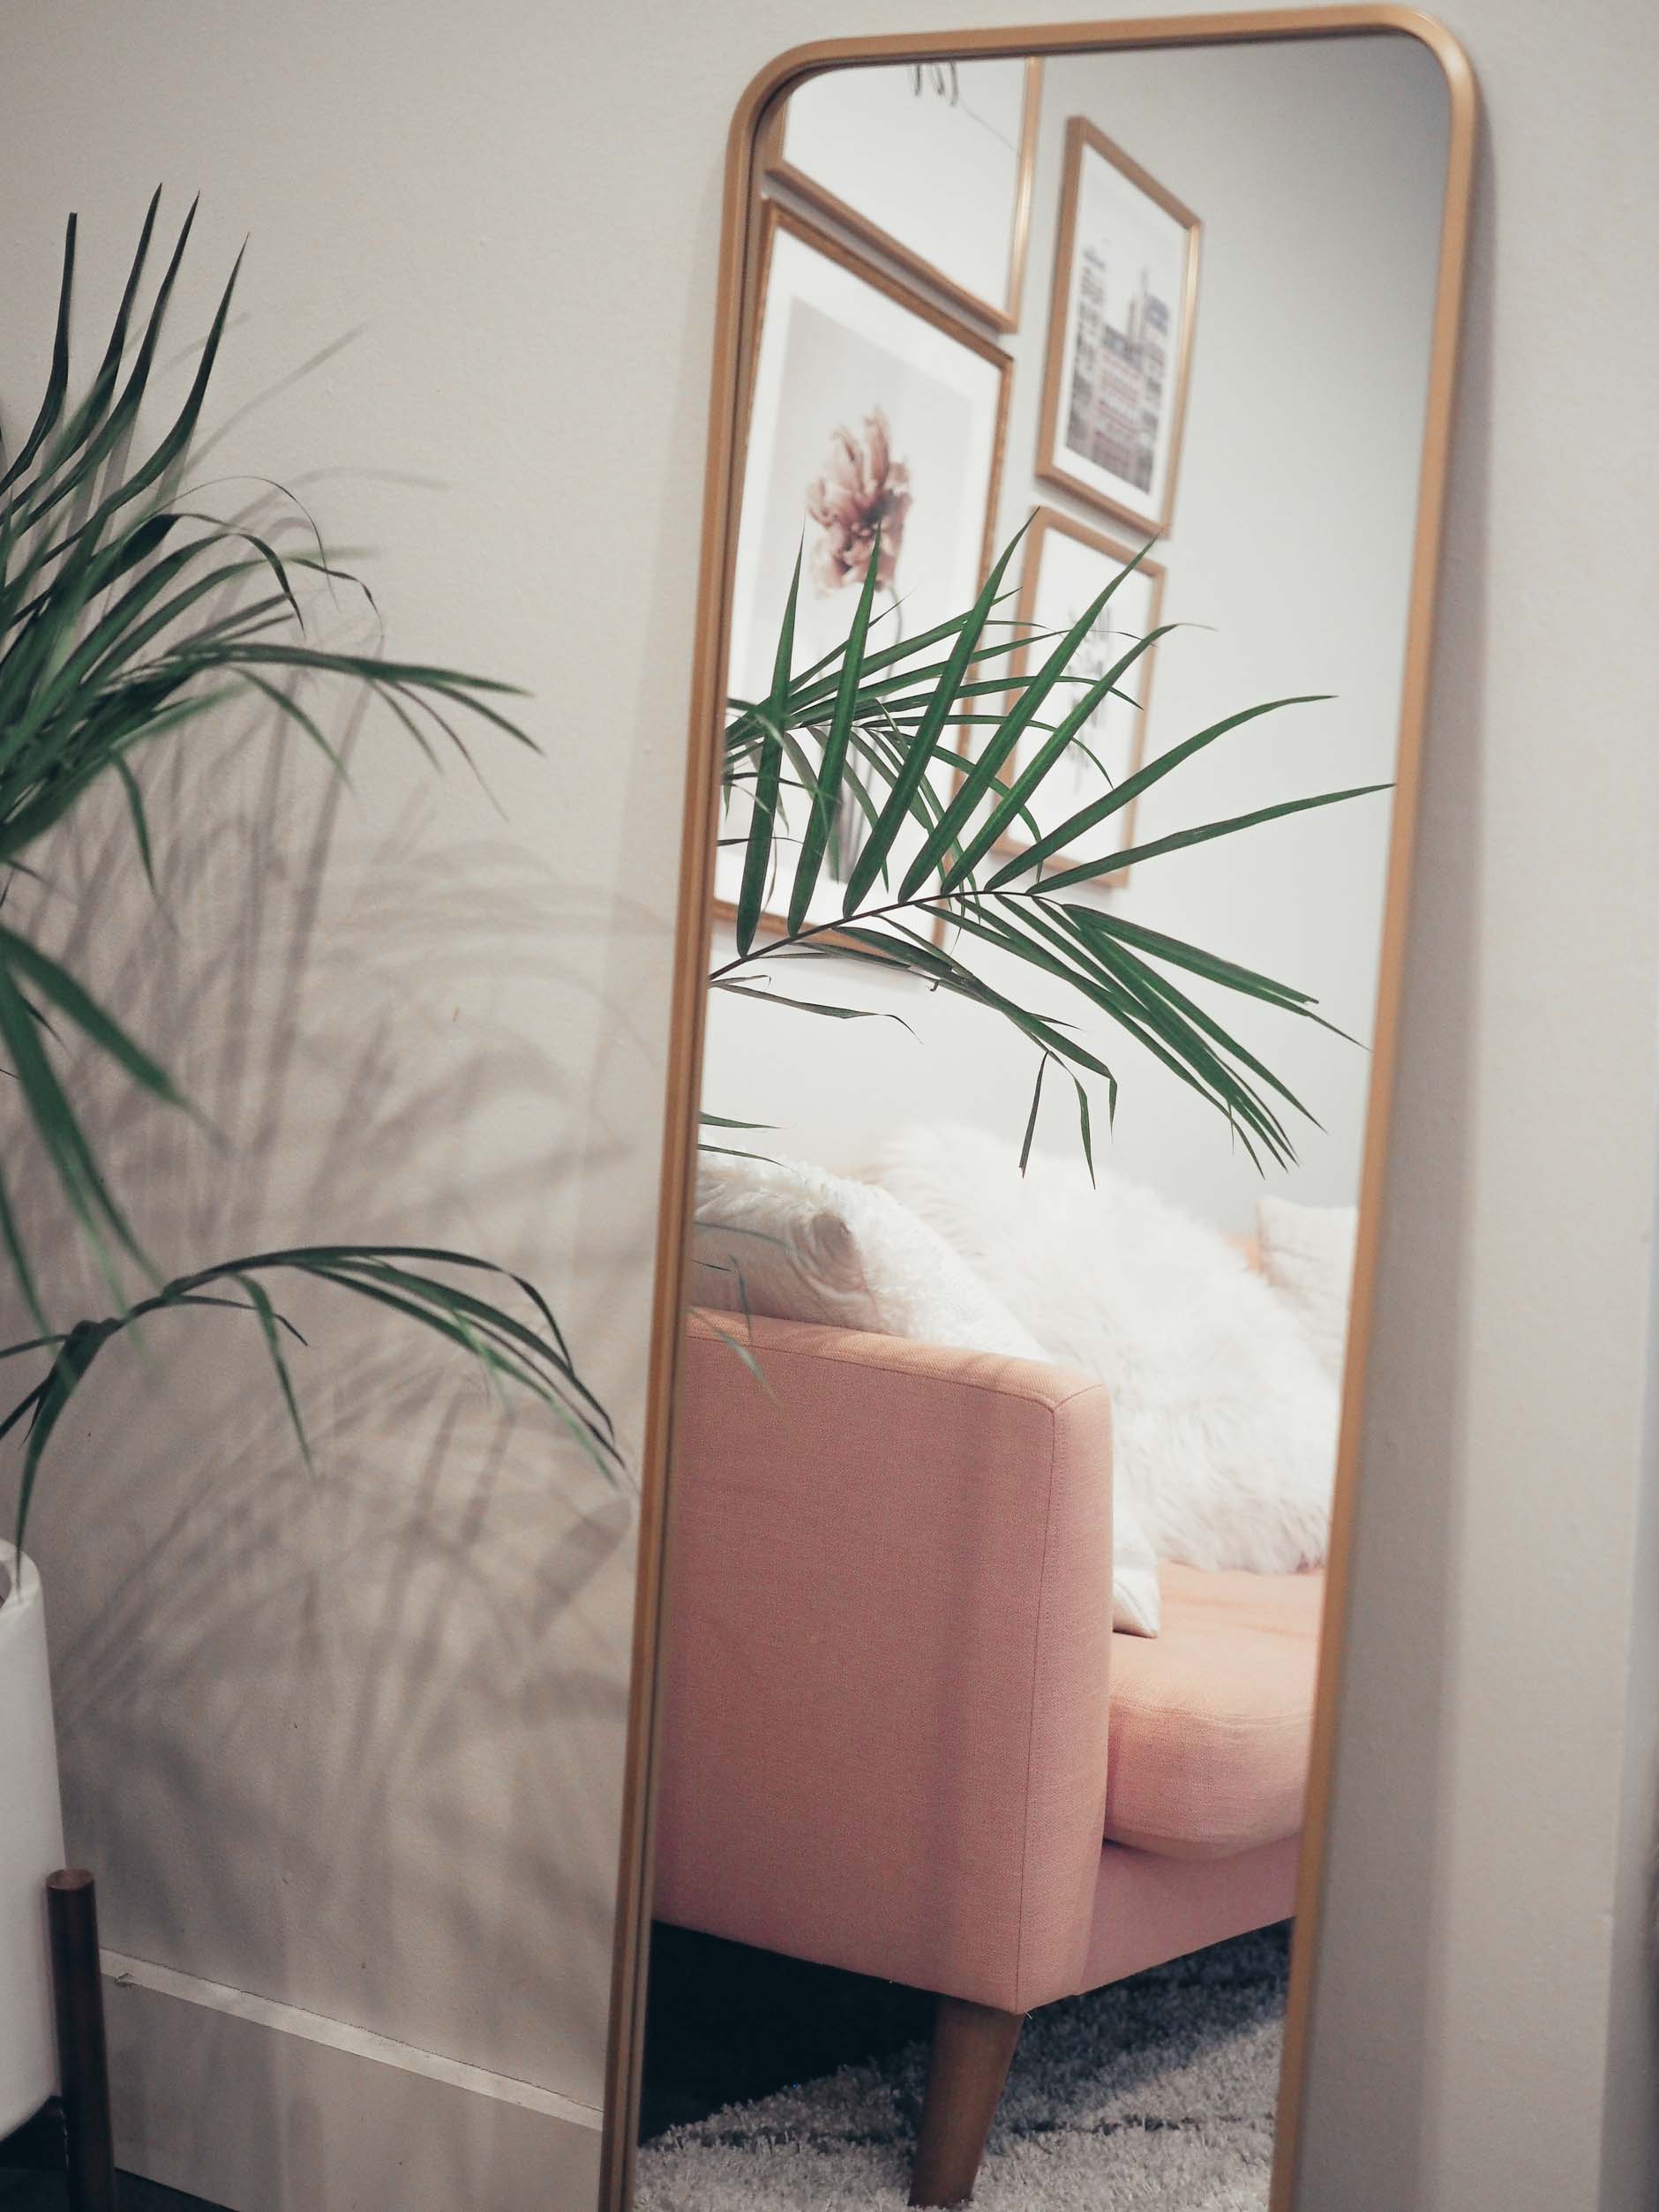
COMING UP WITH SIZES & LAYOUT
The biggest challenge for me was determining the size of each print as well as the layout. Here’s a helpful tip: I screenshot each print online as well as my sofa and inserted the images into a word doc. I was then able to play around with the placement to see what worked best. It was extremely helpful for me to be able to see all of the images together as a whole before purchasing. (see below for example) I ended up choosing 12×16 for four of the prints and then 16×20 and 20×28 for the larger ones.
I’m a very visual person and always find myself trying to balance things out in my space. The beauty of a gallery wall is that there is no right or wrong way to create your collage and story. You can do more of a mix of different sizes and scatter them all around. I personally loved the idea of having the two largest prints in the center with the smaller sizes balancing out the sides.
 PICKING FRAMES
I wanted to go with all antique gold since that’s been a common accent color all throughout my apartment. I got super lucky and found these at Ikea (similar here) for about $6.99 a piece. They have plexiglass, which is great in case they fall down and they’re lightweight. My only issue was finding the 20×28 frame since most stores don’t have this size. I ended up finding it on Amazon and it worked so perfectly with the other frames. It’s painted an antique gold color, but the frame itself is actually wood!
HANGING PRINTS
Ah, the tricky part. This gave me a little bit of anxiety. Parts of my wall are really difficult to get a nail through, so to avoid the hassle of nailing altogether I decided to use command tape. I’m actually not sure if that’s the brand I used – my mom was a sweetheart and picked it up for me – but either way it worked and I hope it continues to work!
Some people cut out pieces of paper or cardboard with the exact photo sizes and tape them to the wall first before hanging their prints. You can find examples of this on Pinterest. Not everyone has my mama though! She came here and worked her magic. All that we used was a pencil, measuring tape and a level. We figured out where I wanted each frame to go (by using the template I shared above) and then measured out the distance with the measuring tape. We then marked all four corners of the frame with a pencil.
We started with the largest print since this was going to be the main piece for the entire gallery. Before sticking the prints to the wall, we put the level in the center of each frame to ensure it would be straight. My mama has a really good eye for these things. I’m so happy that we were able to do this without making holes in the wall. I’ll have to keep you all posted on whether or not these stay up with the tape, but pretty sure they will since it can hold up to 10lbs. 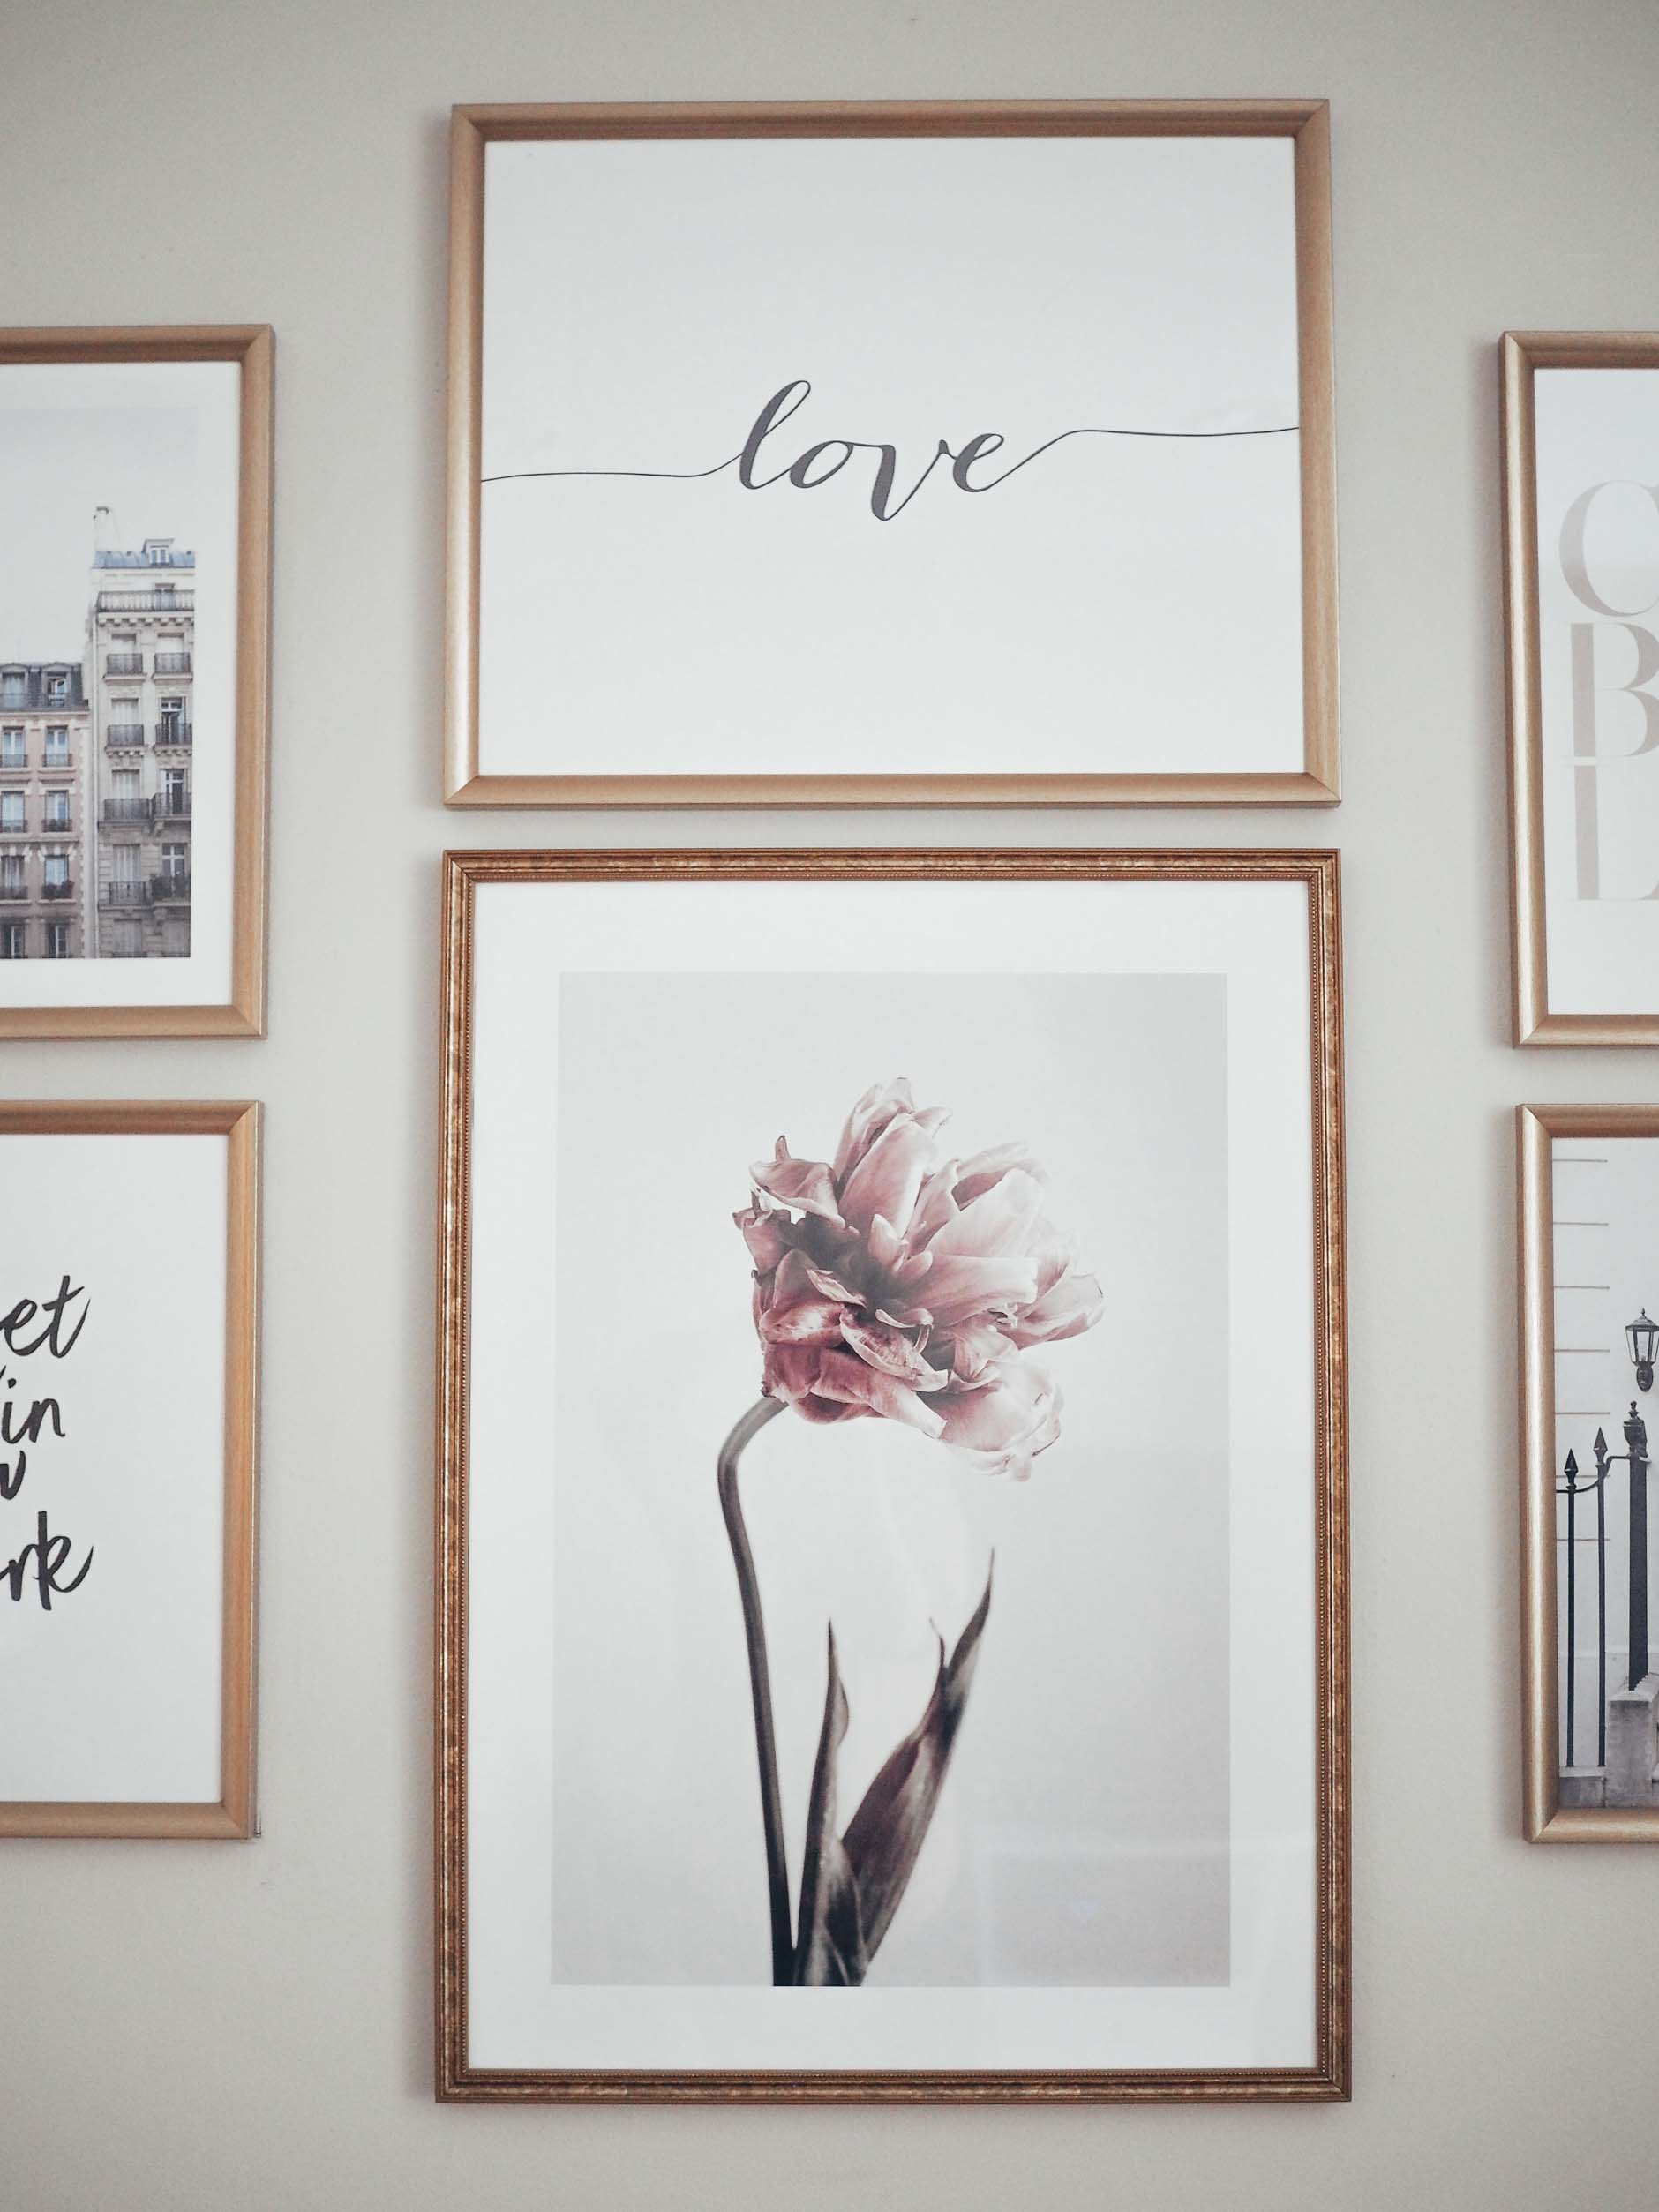
 Throughout all of this I have really grown to love home decor. I never really got to appreciate it when I lived at home with my mom. Having my own place has completely opened up this new world for me in more ways than one.
I have loved sharing every bit of this process with all of you on my instagram. My apartment stories are still up under my highlights and you can see everything from the empty space up until now. What a journey!
Hope you enjoyed my gallery wall and a sneak peek at my living room! I will definitely be doing the full apartment post soon and will make sure to list out where everything is from. Hopefully I didn’t leave anything out, but in case I did and you have any questions drop them below! Thanks for stopping by. ❤️
SHOP THE PRINTS


Top Social media