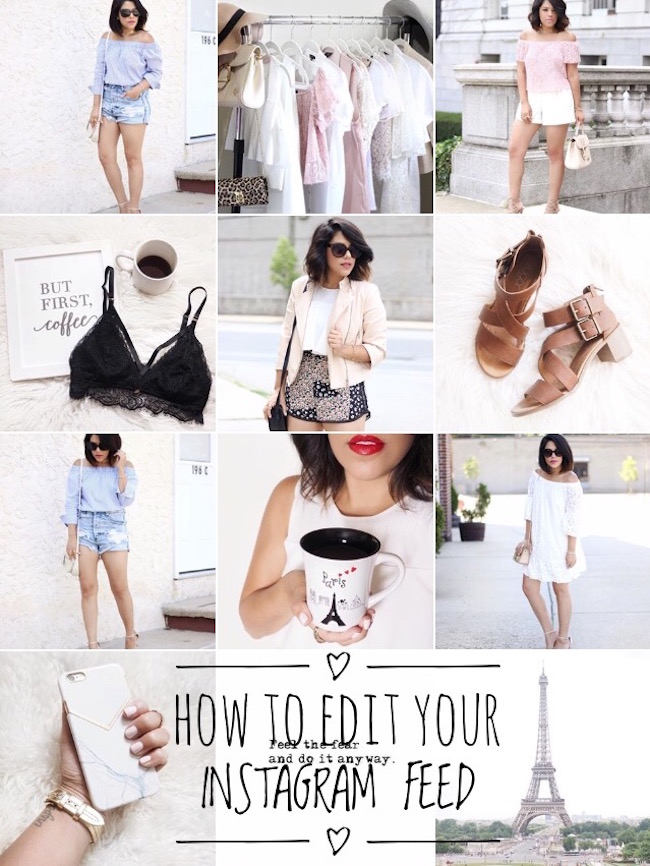
I definitely have a love/hate relationship with Instagram. All of these changes lately with the engagement drop, algorithm change and slow growth has me cursing it out every other day. On the flip side though, I love using it as a space to create and to expand on my content. After being on the app for almost 5 years, I have definitely made countless changes with the way I edit my photos and arrange my feed. My aesthetic has changed and I’ve become more selective in what I post and definitely put a lot more thought and time into each image. I look at Instagram as being an extension of my blog and essentially an extension of me. While I do love to keep everything looking cohesive and visually appealing, I also don’t drive myself too crazy over it either. I want to be able to post the things that I love. I finally found a system that works for me. Lately, I have been getting a lot of questions on how I edit my photos and arrange my feed, so here you go. 🙂
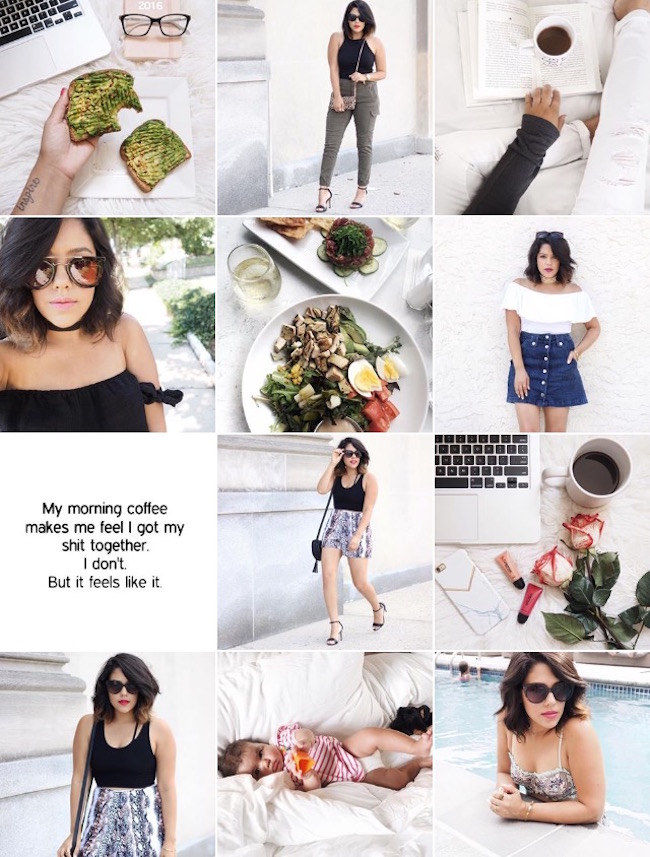
The common factor in all of my photos is white. I personally love this because I think that bright images look really clean and stand out. This can definitely get boring if you never incorporate any other colors. I love color so I needed to make sure I wasn’t limiting myself. I started making sure that every image had white in it in some way whether in the background, in my clothes or in an object for a flatlay and then found an editing routine that worked well with this. Lately, I have been trying to incorporate more grey tones too. I sometimes try to get the colors in one photo to flow nicely into the next image. Doesn’t always happen though. Everyone has such a different preference, so maybe you want more of a dark moody feed, something that is super minimal or a theme that is bold and colorful. Maybe you don’t want a theme at all and that’s fine too. Find what works best for you and then go from there. In addition to colors, variety is super important to me and it also gives me the opportunity to get more creative. I hate only posting photos of myself because I want to be able to show so much more. To be honest, the photos that are not me don’t do as well with photos that have me in it. I think some people would shy away from this and only post what their followers want to see, but I want to be able to post the things that I love regardless of that. I think that now my feed is 50% me and 50% other parts of my life. I love having that balance. I think that when you post the same thing day in and day out it gets super redundant. I figured this out over time. I also pay attention to placement. I know what draws me in when I look at something as a whole, so for me personally I don’t like to post full length shots of myself next to each other or on top of one another. It just throws me off. I know some people who do this and it works for them! It’s just not something I personally like for myself.
The Apps
Snapseed
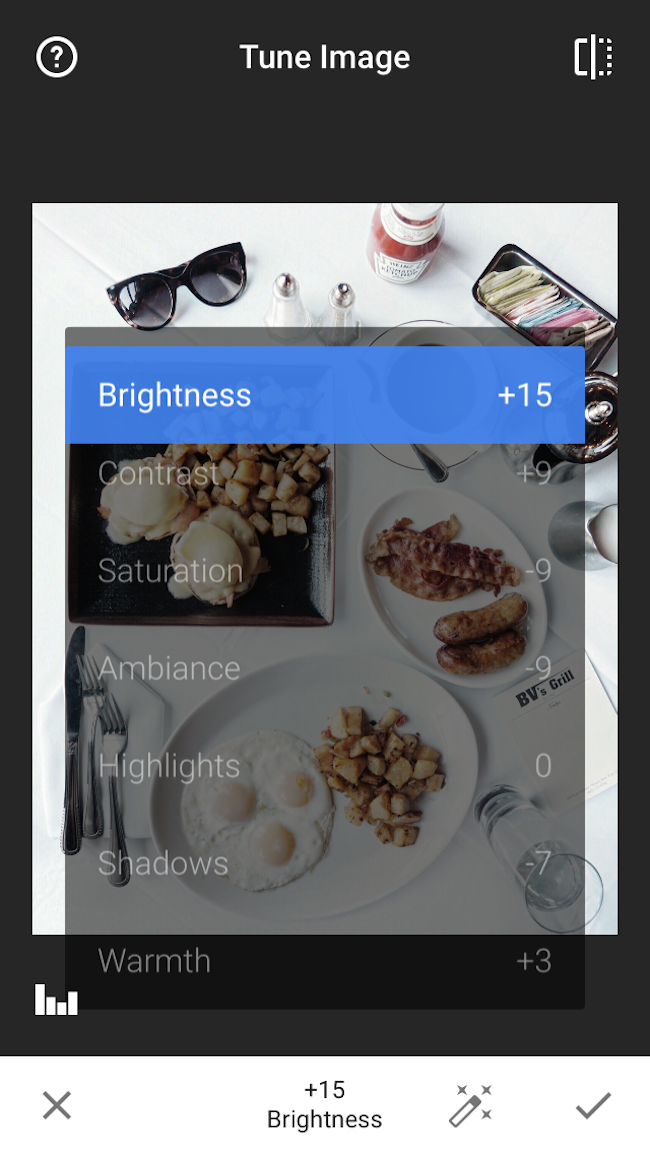
This is my favorite app for editing the lighting in a photo. Every photo will need to be adjusted differently, but I typically turn down the saturation and up the brightness and contrast. If a photo seems a tad overexposed or not super crisp, I turn down the shadows and this helps to enhance the image. I love that you can edit specific areas in a photo too. I’m not a huge fan of greenery, so if there is any in my photo I can choose to turn down the saturation in that section only. Depending on the lighting, I notice that my photos can have a bluish tint to them, which I hate. If this happens I turn up the warmth a little bit and turn down the saturation. This makes a huge difference. Everyone edits very differently. Some love saturation and warmth, some prefer more cool tones and others like darker images. So again, it all comes down to what you like most.
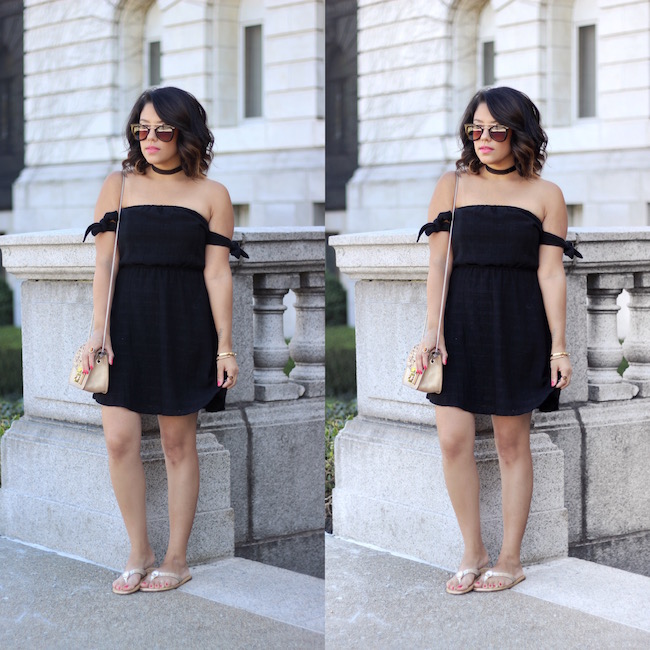
Here is an example of a photo that I edited this week for Instagram. You can see the difference in the before (left) and after (right). The right side of the photo in the original was a bit dark for me so I wanted to brighten this up and also desaturate to get rid of any blue tones. I mostly did this by using both the tune image and selective tools in Snapseed. I do my best to show change in the photo without over editing.
Facetune
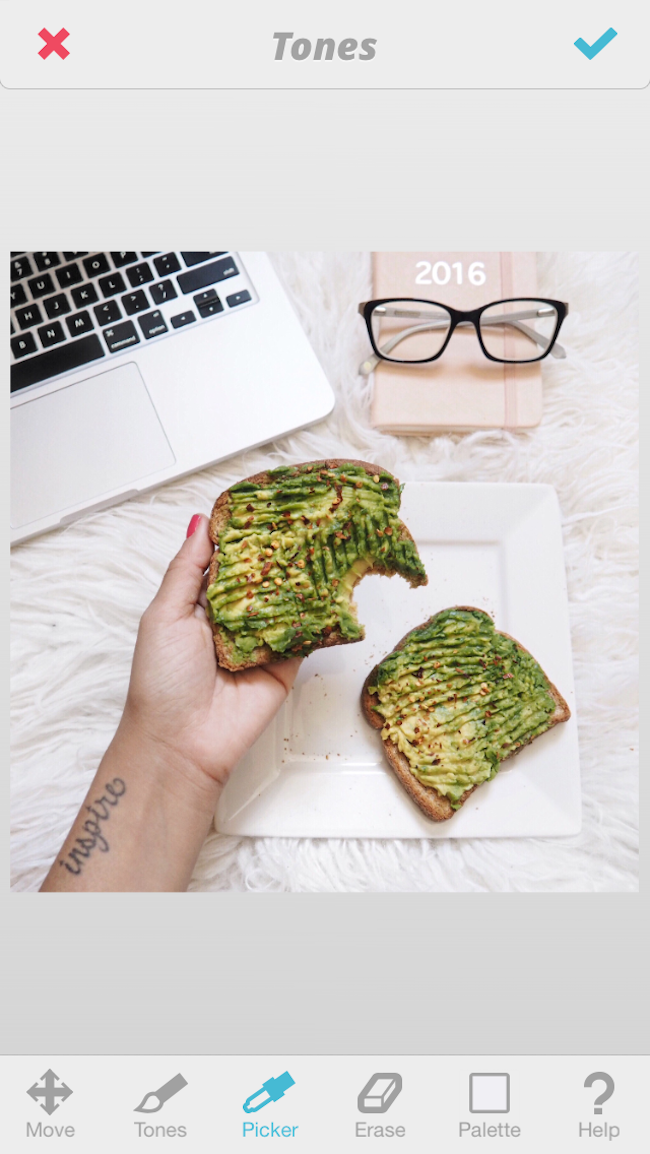
This app will forever be known as the app where you can change your body and the way you look. Aimee Song recently posted a video on the right ways to use the app and I’m happy she did because there are much better ways to put it to use. It’s actually very helpful. I personally use it for tones, details and patch. I often get asked how I make my whites so white and it’s from a mixture of things, but the tones help with this so much. You can pinpoint the whitest area (or whatever other color) in the photo and literally color over the parts you want to change. So sometimes I shoot on my sheets or rug and it can be dark and shadowy in some areas. I color over those sections by using tones to make the photo white all around. As shown above you just use the picker to pinpoint the color and once it’s highlighted as shown in palette, click on the tones brush to color the areas.
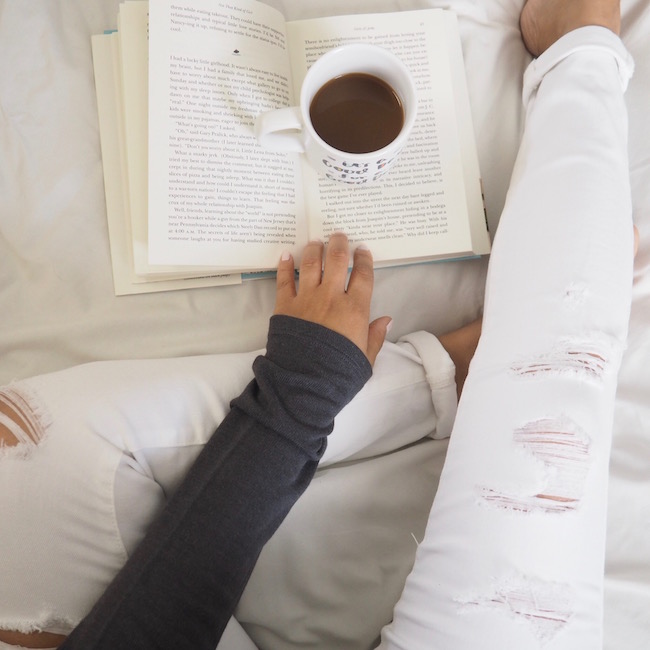
This is a before photo and you can see here what I meant about shooting on white but it still being dark/shadowy. On the left side it really shows that those areas were super saturated. It’s my pet peeve.
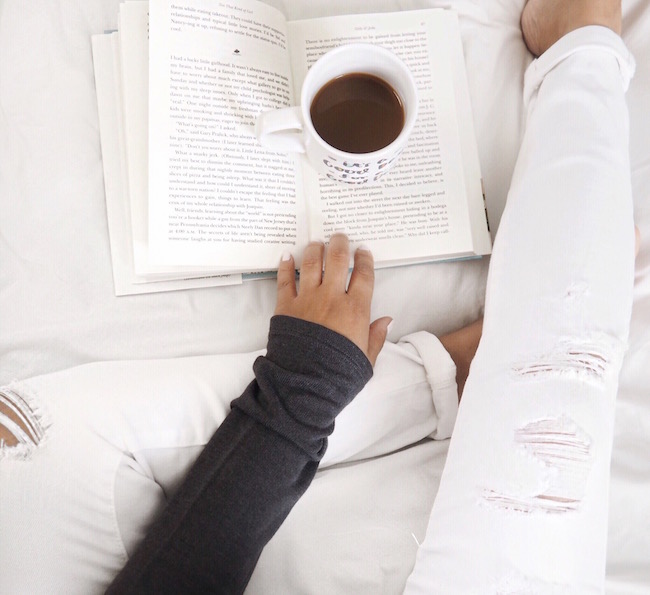
Now here is the after. I created this edit by turning down the saturation A LOT and then using tones in Facetune to color over the darker spots. I also used details throughout the photo too for enhancement. This is a great tool for an object in a photo the might be out of focus or a tad blurry. Patch is awesome for removing unwanted objects in a photo. For example, if your picture has something on the ground that bothers you, you can use patch to remove it and replace that area in the photo with the space around it. You have to be really careful of this though, so afterwards I typically use the smooth tool to go over that area.
VSCO
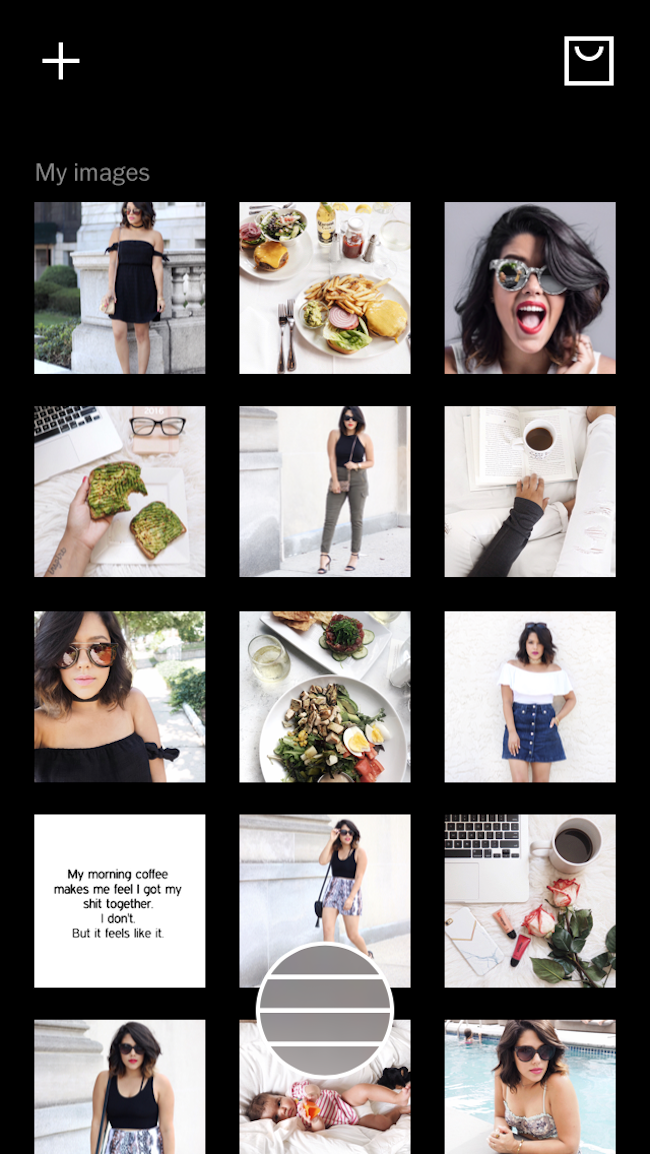
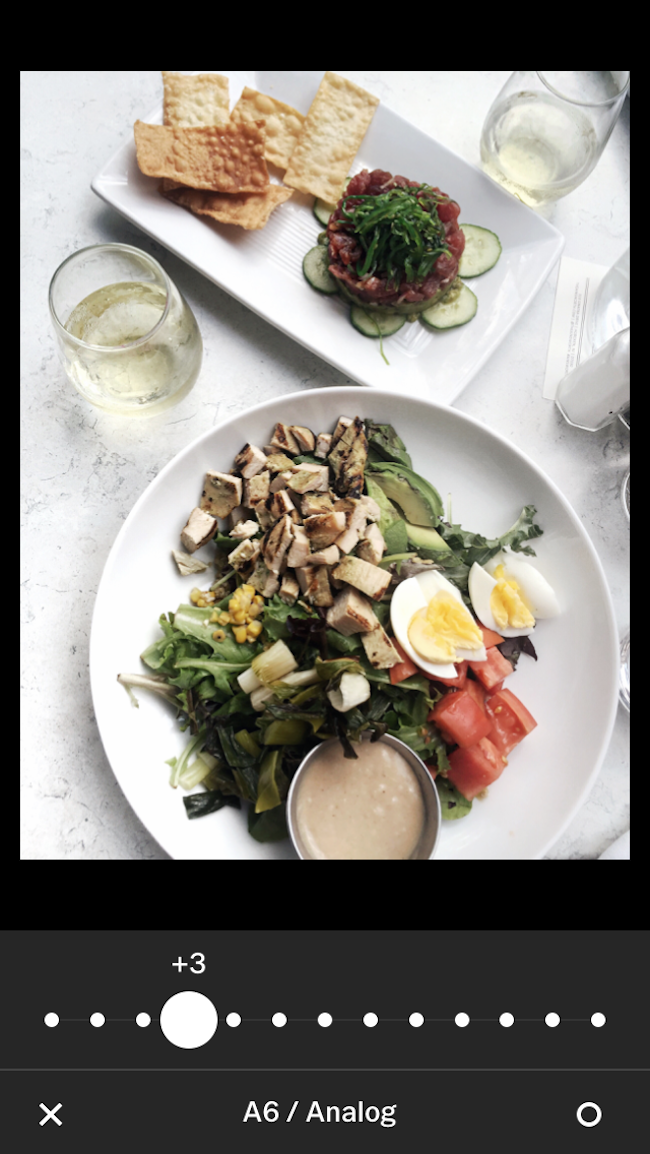
This is another one of my favorite apps and the last one I use before posting. You can also adjust the lighting, but you can’t select specific areas which is why I do this in Snapseed. You can choose from a variety of filters, all which will give your photo a different aesthetic. Some are free, but others you have to pay for. This is where cohesiveness for the feed comes into play. You can select the same filter for every photo you post, which is what I do. I have tried out several, but A6 has been my go-to for awhile. You don’t want to overdo this though or else it will take away the quality of your photo. I only use 1-4 levels depending on the pic, but each photo has the A6 filter. VSCO can also be used to arrange your feed and see the layout before posting to Instagram. My entire IG feed is in VSCO (as shown above) and here I can play around with the placement. I also have used Planoly to arrange my feed and actually prefer it over VSCO for this feature because you can drag and drop images, but after the 15 day trial you have to pay. There’s also a free one called UNUM, but I don’t like it as much.
When using the filters, you can press on the image to see the before and after to determine whether or not you want to add more or less. Photos of me I tend to use +1 or 2 and other pictures I add +3 or 4. Again, just be careful not to overdo this.
How I Shoot
My outfits and blog photos are shot with a Canon Rebel T3i and a 50mm 1.8 lens. When it comes to photos for Instagram, I typically always use my Olympus Pen E-PL7. Of course you can use your iPhone, especially with all these apps to enhance the images. The Olympus is also my new travel camera, I just need to upgrade the lens soon. It has built in WiFi so I instantly transfer the photos over to my phone within seconds. I can set it in square mode, just like on the iPhone. My favorite part is that the screen flips and rotates around making those above view shots easier to take. For me personally, I just prefer the quality of the images and have gotten used to using this. I shoot in manual mode always so that I have full control over adjusting the lighting. For any flat lays and indoor shots, I shoot right by my bedroom window with the natural light coming through. I usually have to up my ISO and then play around with the settings to get the lighting just right. For backdrops, I tend to use my comforter, sheets, faux fur rugs, poster board, etc. A secret is that you can actually order backdrops, like marble, on Etsy. I want to get one of those soon!
I have formed a love with photography and I keep trying to learn more so that I can get better at it. Once I made the effort to start focusing more on my IG content and to get more creative with what I post, I realized how much I enjoy doing this. I actually like to edit my photos now. It’s fun for me and also challenging too because I am forced to constantly think of new images to create and post. Trust me, I get stuck a lot. I definitely get inspiration from others, especially on Pinterest, but I try not to focus too much on what they are posting so that I can just remain true to me. With thousands of bloggers on Instagram, the best way for you to stand out is to just be yourself and create your own lane. Also remember, that no one’s life is as perfect as their Instagram feed. For most, photos have been staged, edited and filtered. I include myself in this. It makes for beautiful imagery, but of course life goes way beyond the photos that we choose to post. Don’t be afraid to show your personality and give others a glimpse into your life that goes beyond the outfits and fashion photos. It’s all about creating that balance.
I hope that this post was helpful for you. If you’re not following me yet on Instagram, I hope you will! @natymichele
It’s definitely not easy to keep it cohesive! I think the key is to figure out a way to do this without having to compromise the images you want to post. xo
I use some of these too and have been thinking about signing up for Planoly, it just seems like a lot of money to spend. Those features are just so good though!
xx Jenelle http://www.inspiringwit.com/
Hi Naty, I just want to say thank you i have foLlowed alot of fashiOn bloggers, but it wasnt until i came across your Page, when i finally got the courage to start up my new ig account based on my own fashion style but also those around me and feature different body types and styles! So thank you!!!!
Sign up to receive a personal newsletter from Naty straight to your inbox each week. You’ll get access to exclusive content, special announcements, behind the scenes and other surprises!
let’s connect
Sign up to receive exclusive
content straight to your
inbox each week.
Are you an insider?
Sign up to receive a personal newsletter from Naty straight to your inbox each week. You’ll get access to exclusive content, special announcements, behind the scenes and other surprises!


Thank you for sharing, Naty! I love editing photos as well but sometimes still struggle to keep my Insta feed cohesive.
Paulina
http://www.shenska.com
It’s definitely not easy to keep it cohesive! I think the key is to figure out a way to do this without having to compromise the images you want to post. xo
This was so helpful. Lil wonder your pics are always so crisp and lovable.
Thanks for the tips girl.
xxx
ChiChi
Oh good so happy it helped! xo
Great post, thanks for putting this together. Like those apps👌🏾💯
I use some of these too and have been thinking about signing up for Planoly, it just seems like a lot of money to spend. Those features are just so good though!
xx Jenelle
http://www.inspiringwit.com/
i like your hand bag and coffe cup heal is so nice
kaley cuoco bikini
Hi Naty, I just want to say thank you i have foLlowed alot of fashiOn bloggers, but it wasnt until i came across your Page, when i finally got the courage to start up my new ig account based on my own fashion style but also those around me and feature different body types and styles! So thank you!!!!
Oh wow that means so much to me! So happy you found me and that it’s helped you to create your own account. Sending love your way! xo